The Chatbot Editor
To create a new Chat agent, navigate to your workspace and click New Agent, then select Chat. Enter a name and description for the agent, then click Create. The agent opens on the Settings tab — navigate to Workflow to start building.
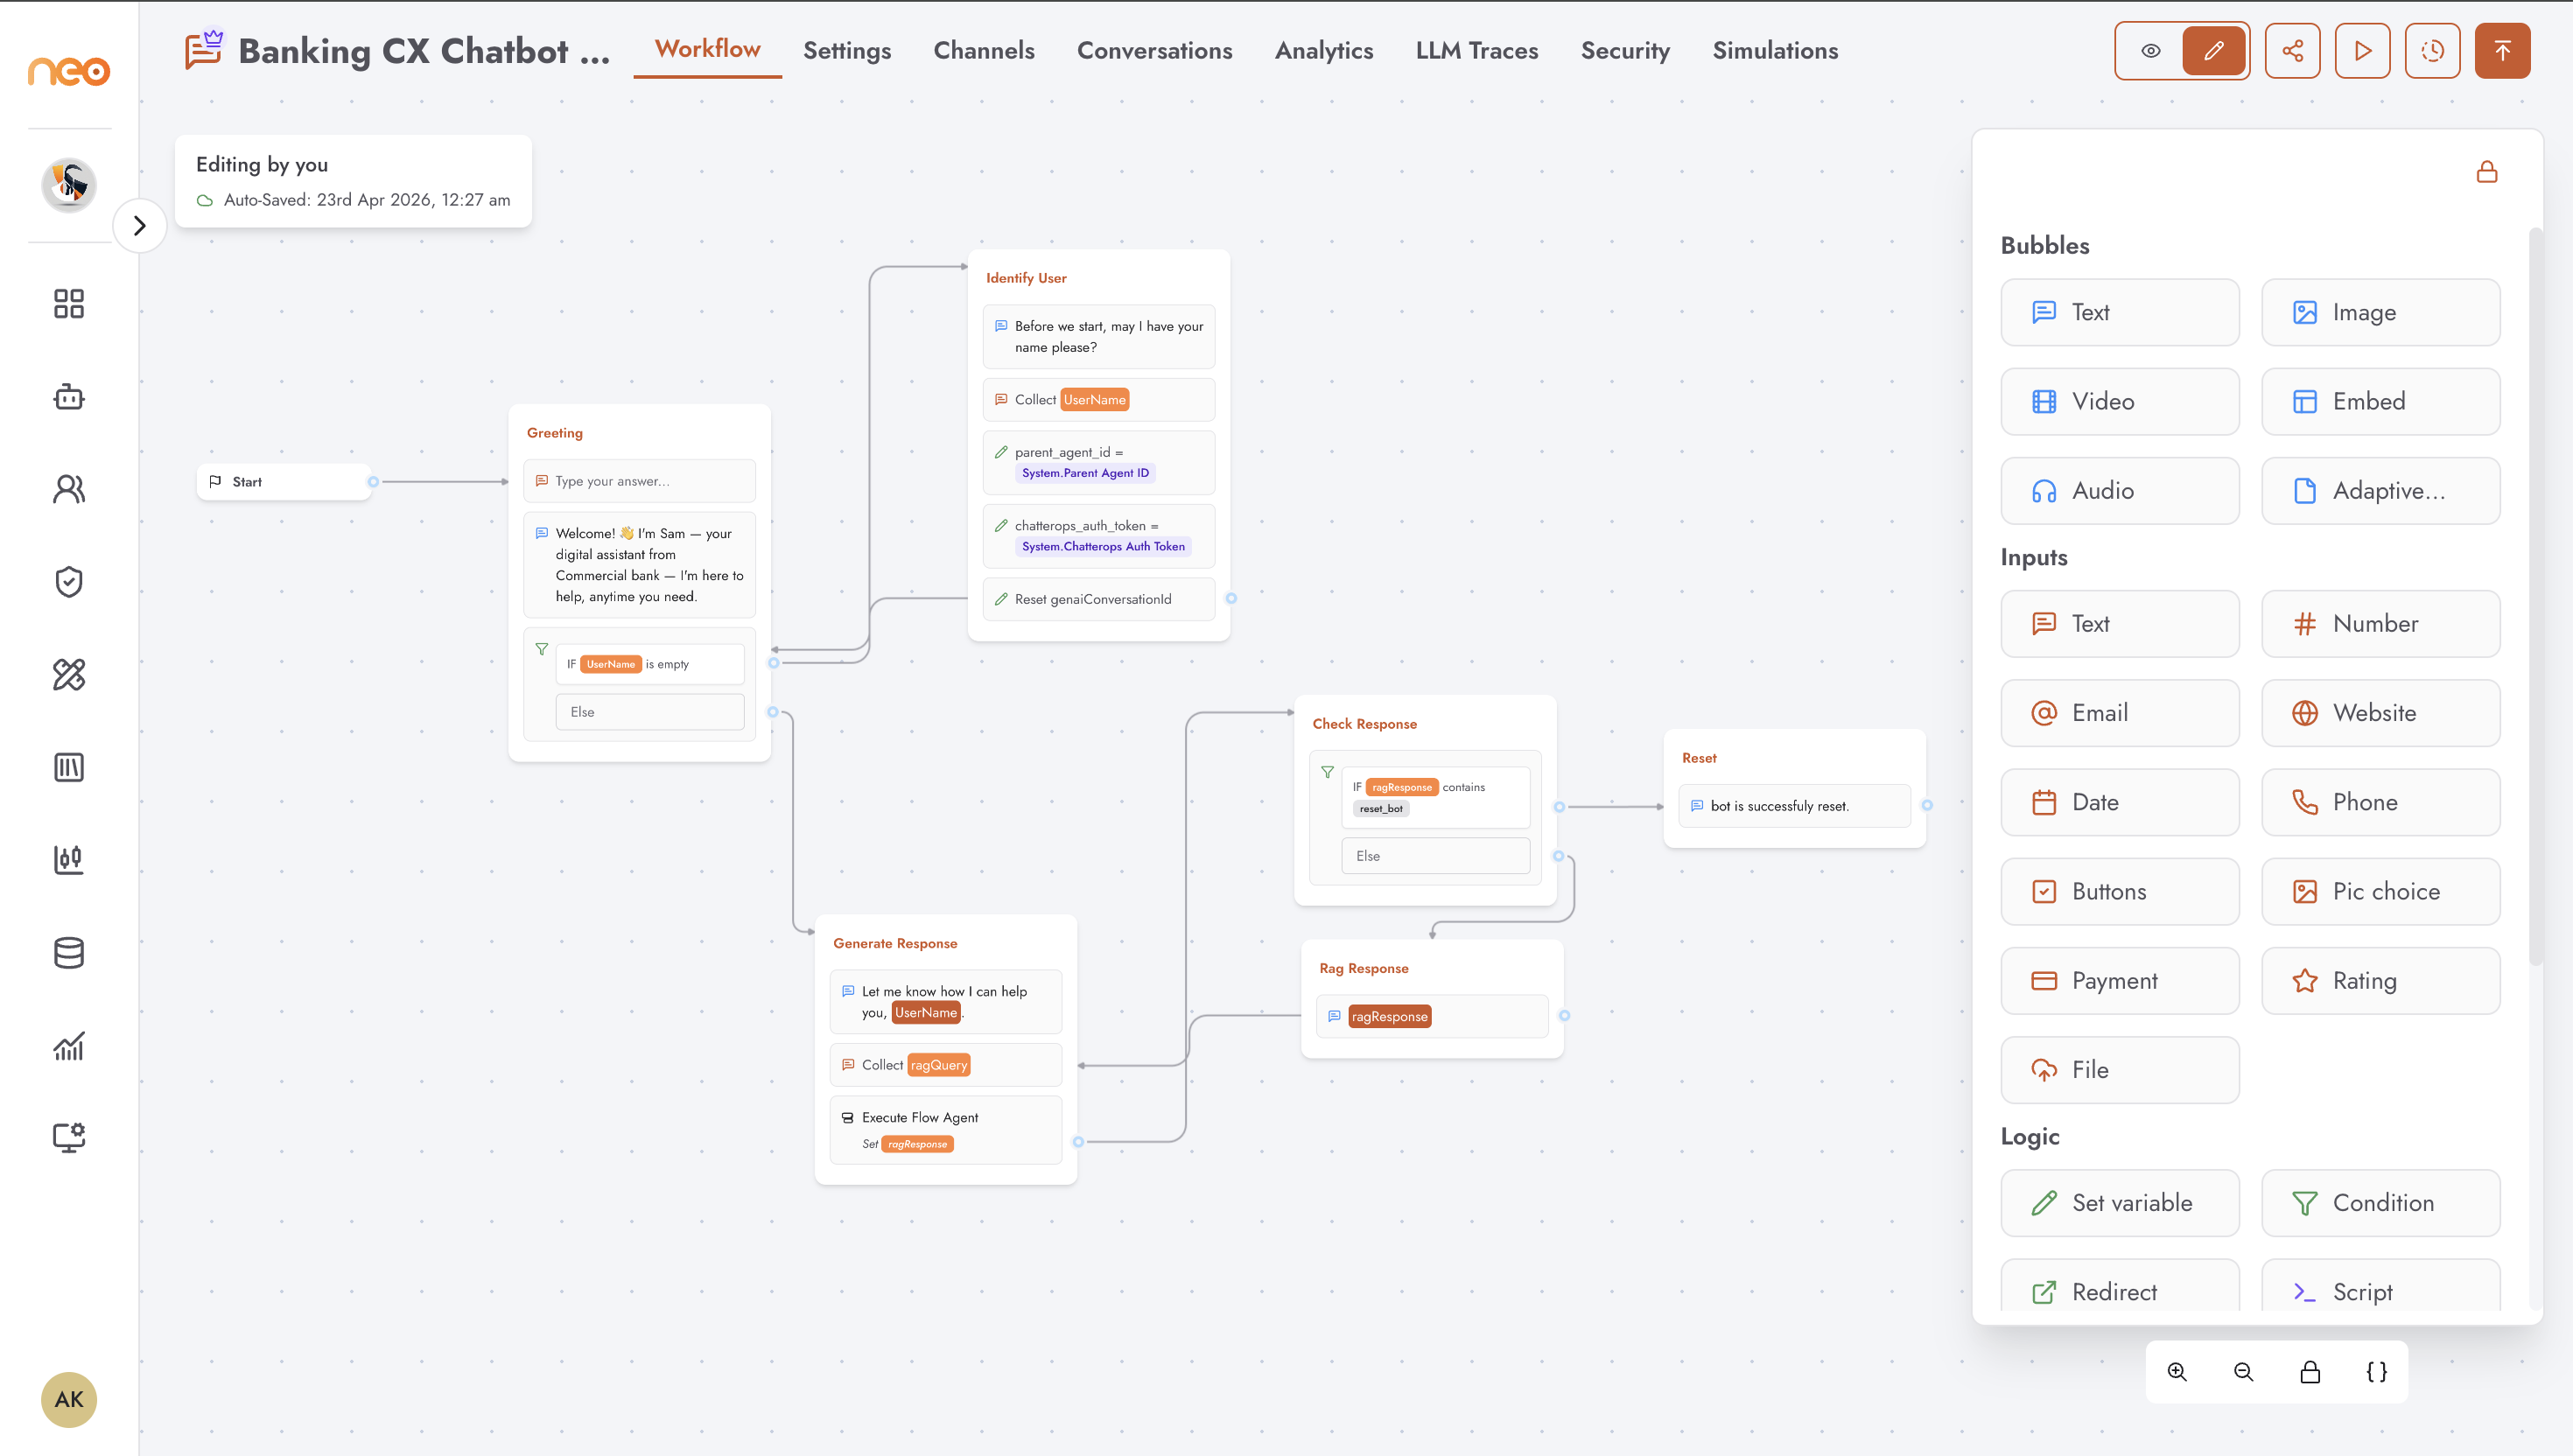
Canvas Layout
The Workflow tab is the flow canvas. It has two main areas:
- Canvas
The working area with a dot-grid background. Groups are positioned freely and connected by edges. Pan by clicking and dragging the background. Zoom using the scroll wheel or the zoom controls in the bottom-right corner.
A status badge in the top-left of the canvas shows the current edit state — for example, “Available for editing — VIEW ONLY” when edit mode is off. Click Toggle edit mode to take ownership and start editing.
- Block sidebar
Slides in from the right edge of the canvas. Contains four sections — Bubbles, Inputs, Logic, and Integrations — each listing all available block types. Drag any block onto the canvas to add it to a group.
Groups
A group is the core building unit of a chatbot flow. Each group has an editable title and contains one or more blocks that execute in sequence when the conversation reaches that group.
To add a group, double-click an empty area on the canvas. To rename it, click the group title. Groups can be freely repositioned by dragging.
When a group is selected, a small toolbar appears above it with three actions: Preview from this group (play icon), Copy, and Delete.
The Start node is a special event node that marks the entry point of every conversation. Every flow begins here.
Connecting Groups
Edges connect the output of one group to the input of another, defining the conversation path. To draw a connection, hover over a block’s output endpoint — a dot appears — then drag to the target group or block.
An edge without a target is shown as a dashed drop-off line, indicating the conversation ends at that point.
Testing from the Canvas
Click the Playground button (play icon) in the header to open the preview panel on the right. This loads the current draft of the flow so you can test the conversation without leaving the editor.
You can also start testing from a specific point in the flow: select a group and click the play icon in the group toolbar above it. The preview starts from that group rather than from the beginning.
See Testing for a full guide to testing your chatbot.