Build Your First Agent
This tutorial walks you through building, testing, and publishing a working Agentic Flow agent from scratch. No prior experience with OneByZero Neo is needed.
What you’ll build: A simple conversational agent — three components wired together — that takes a user’s message, passes it to an LLM, and returns the response. Once it’s working, every other agent you build is a variation on this pattern.
Time to complete: ~20 minutes.
Before You Start
Make sure you have:
Access to a OneByZero Neo workspace (your Workspace Admin should have invited you).
The
canCreateAgentspermission in your role. If you can’t see a Create button on the Command Center home page, ask your Workspace Admin to check your role permissions.
Step 1 — Create a New Flow Agent
From the Command Center Home, click Create at the top right.
Select Flow Agent.
Enter a Name (e.g.
My First Agent) and a short Description.Click Create.
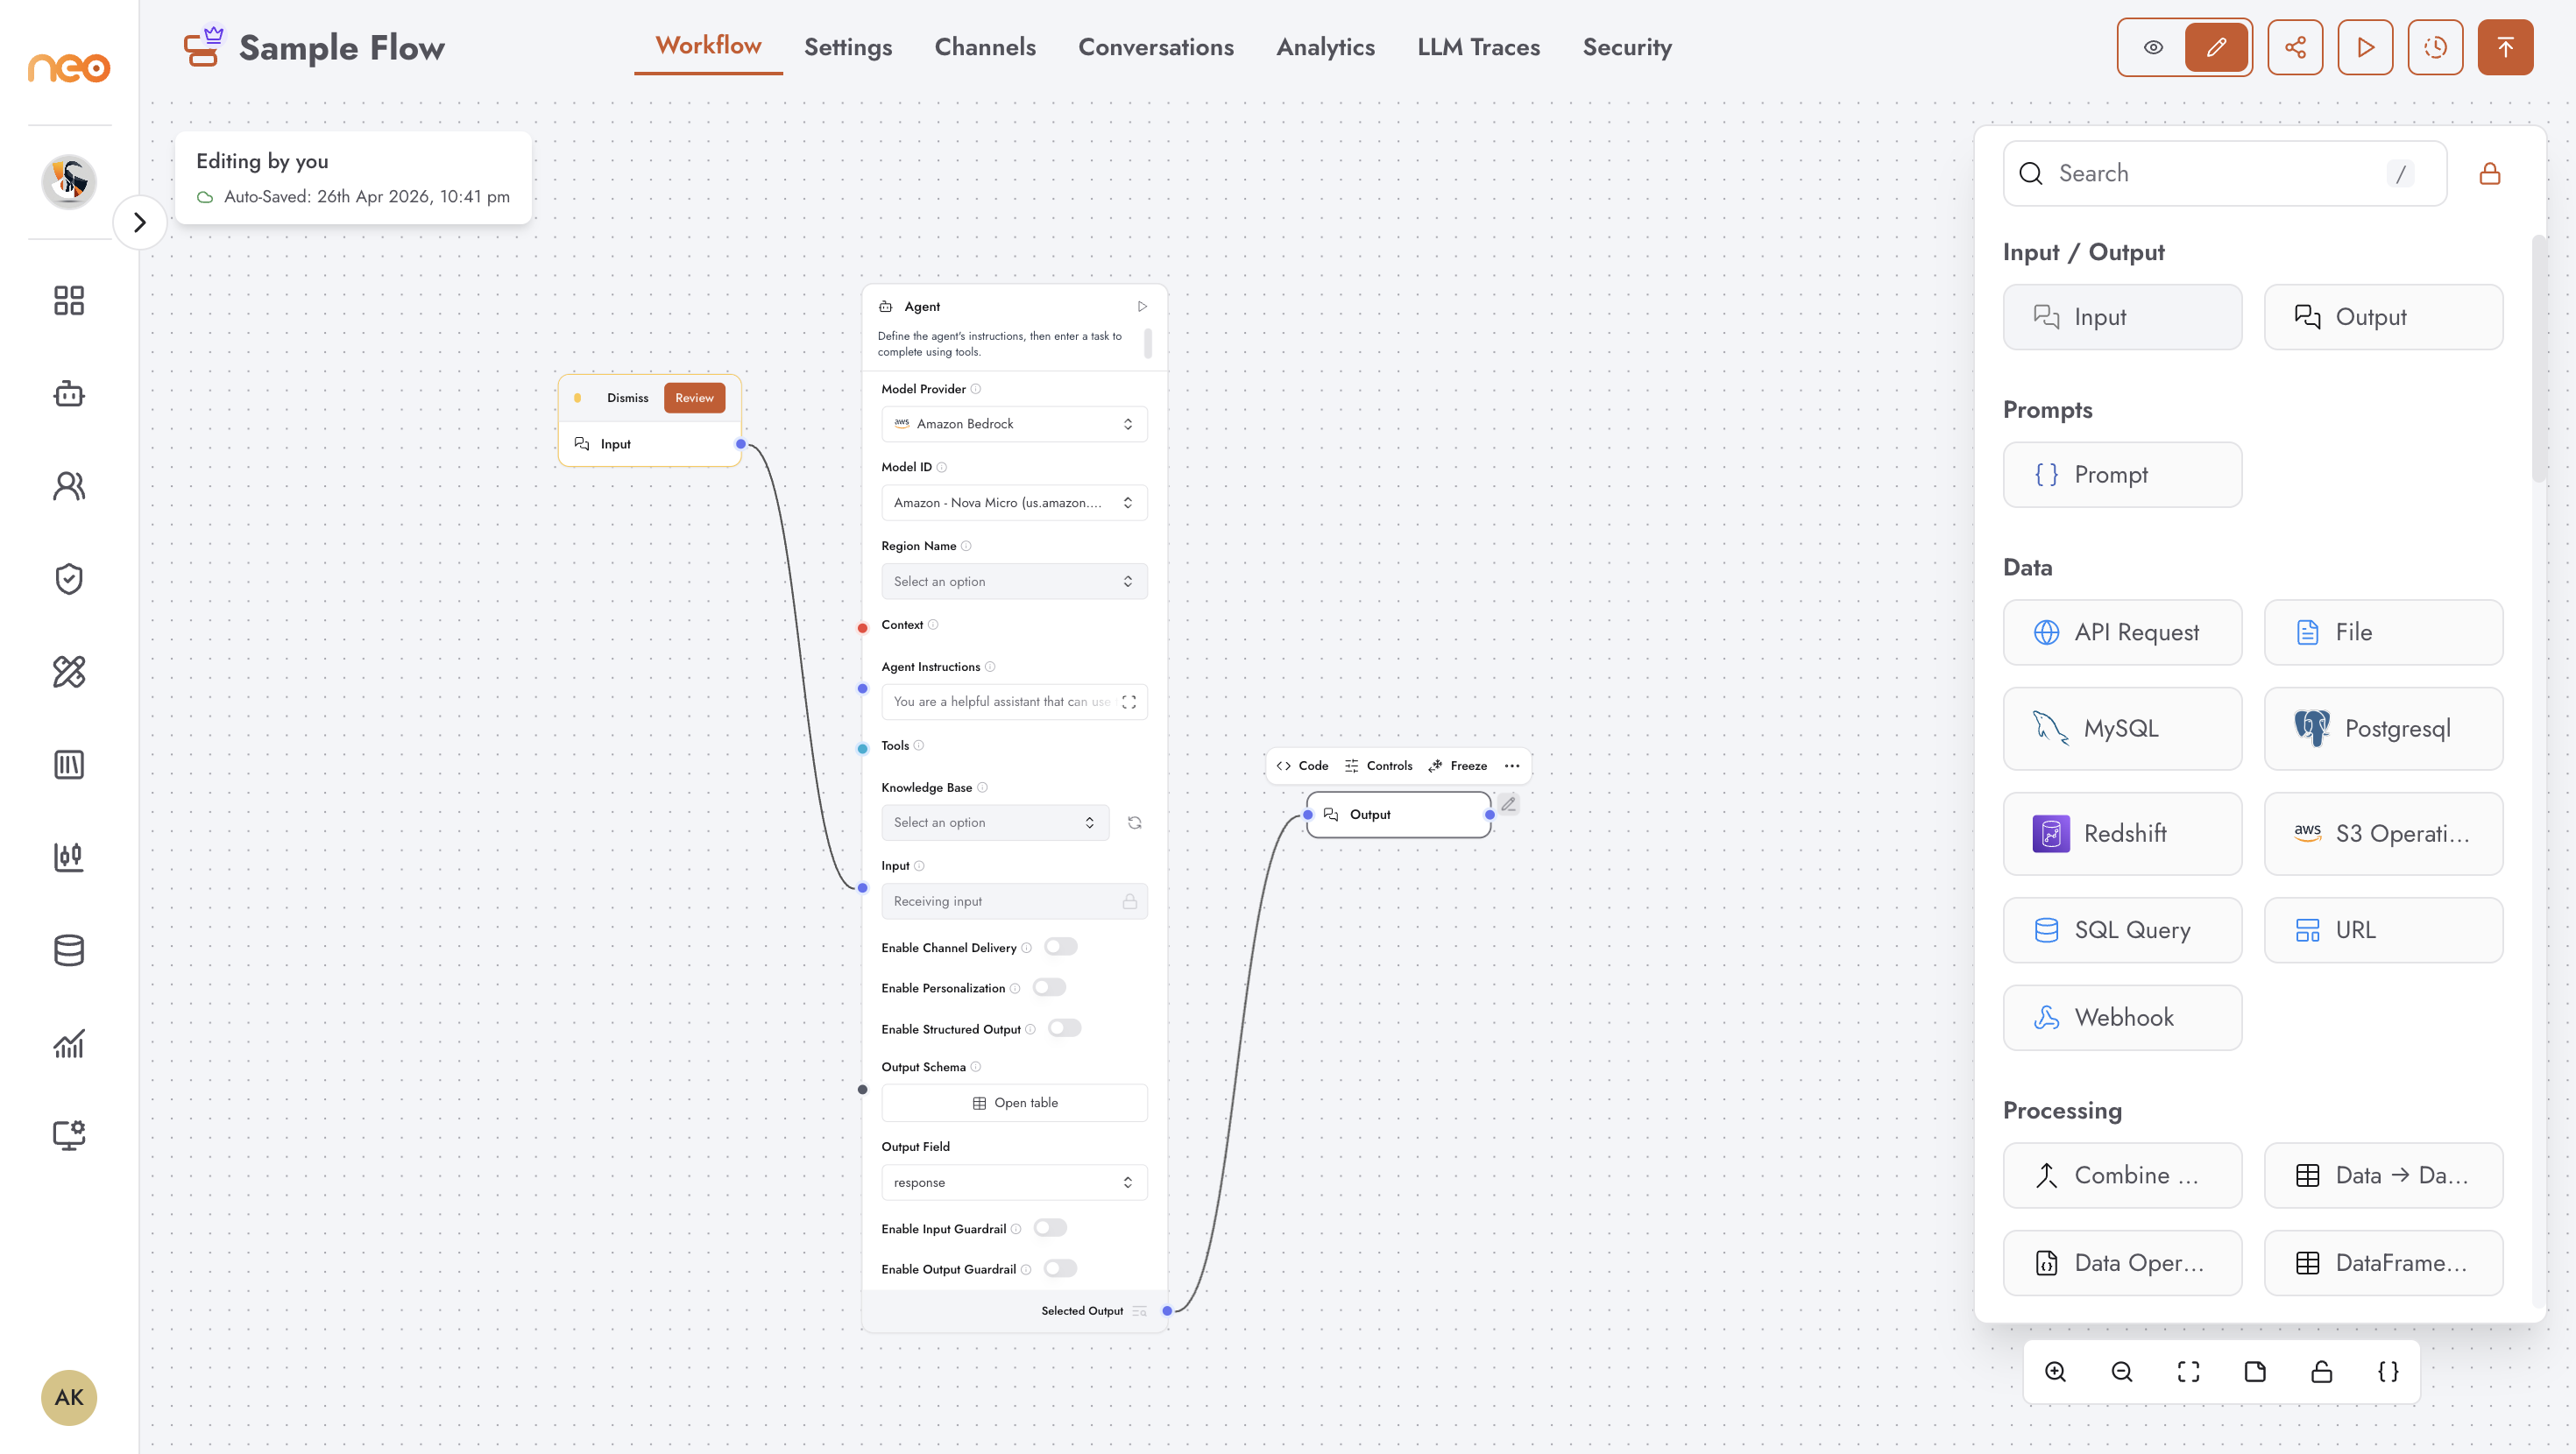
The Agentic Flow canvas opens. You’ll see an empty canvas in the centre and the component sidebar on the right.
Step 2 — Add an Input Component
The Input component is the entry point — it receives the user’s message and passes it into the flow.
In the component sidebar, find Input under the Input / Output category.
Drag it onto the canvas, or double-click it to place it at the centre.
You’ll see a node appear on the canvas with an output handle (coloured circle) on its right edge.
Step 3 — Add an Agent Component
The Agent component is the brain. It takes the input, calls an LLM with your instructions, and produces a response.
In the component sidebar, find Agent under the Agents category.
Drag it onto the canvas to the right of the Input node.
Click the Agent node to open its configuration panel.
In the configuration panel:
Model — select an LLM model from the dropdown. Any model listed here has been configured by your Super Admin and is ready to use.
Agent Instructions — enter a system prompt. For this tutorial, use something simple:
“You are a helpful assistant. Answer the user’s question clearly and concisely.”
Leave all other settings at their defaults for now.
Step 4 — Add an Output Component
The Output component is the exit point — it returns the Agent’s response back to the caller.
In the component sidebar, find Output under the Input / Output category.
Drag it onto the canvas to the right of the Agent node.
Step 5 — Connect the Components
Now wire the three components together so data flows from left to right.
Hover over the Input node until you see its output handle (right edge) highlight.
Click and drag from the Input output handle to the Agent node’s input handle (left edge). A connection line appears.
Drag from the Agent node’s output handle to the Output node’s input handle.
Your canvas should now show: Input → Agent → Output.
The canvas auto-saves as you work.
Step 6 — Test in the Playground
Before publishing, test the flow using the Playground.
Click the Playground button (play icon) in the top-right of the editor header. A chat dialog opens.
Type a message — for example: “What is the capital of France?”
Press Enter. The flow runs and the Agent’s response appears below your message.
If the response looks correct, your flow is working. If the Playground button is greyed out, check that both the Input and Output components are on the canvas.
Step 7 — Publish the Agent
Publishing makes the agent available to live channels and the API. The publish flow has three steps: validate, review, and publish.
Click the Publish button (top-right header).
Select Validate. The system checks the flow for errors. Wait for the Valid status to appear.
Click Request. This submits the flow for approval and sets the status to Pending Approval.
If you have approval permissions, click the Publish button again and select Review. Click Approve.
Click Publish once more and select EKS to deploy the approved version to the live environment.
Your agent is now published and live.
Note
In some workspace configurations, the review and approval step may be handled by a different team member. If you submitted for review but cannot approve yourself, ask a colleague with approval permissions to complete step 4.
What’s Next
You’ve built the simplest possible Agentic Flow. Here’s how to make it more capable:
Add a Knowledge Base — connect a Knowledge Retrieval component so the agent can answer questions based on your organisation’s documents. See Using Knowledge Bases in Agents.
Add Tools — give the agent the ability to search the web, run code, or call your APIs. See Integrations.
Add Guardrails — apply safety and compliance policies to the agent’s inputs and outputs. See Guardrails.
Deploy to a Channel — connect the agent to WhatsApp, Slack, a web widget, or any other channel. See the Channels section in Flow Agent Settings.
Monitor it — view conversations, LLM traces, and usage analytics in the Command Center. See Command Center.