The Agentic Flow Editor
To create a new Agentic Flow agent, click New Agent and select Flow.
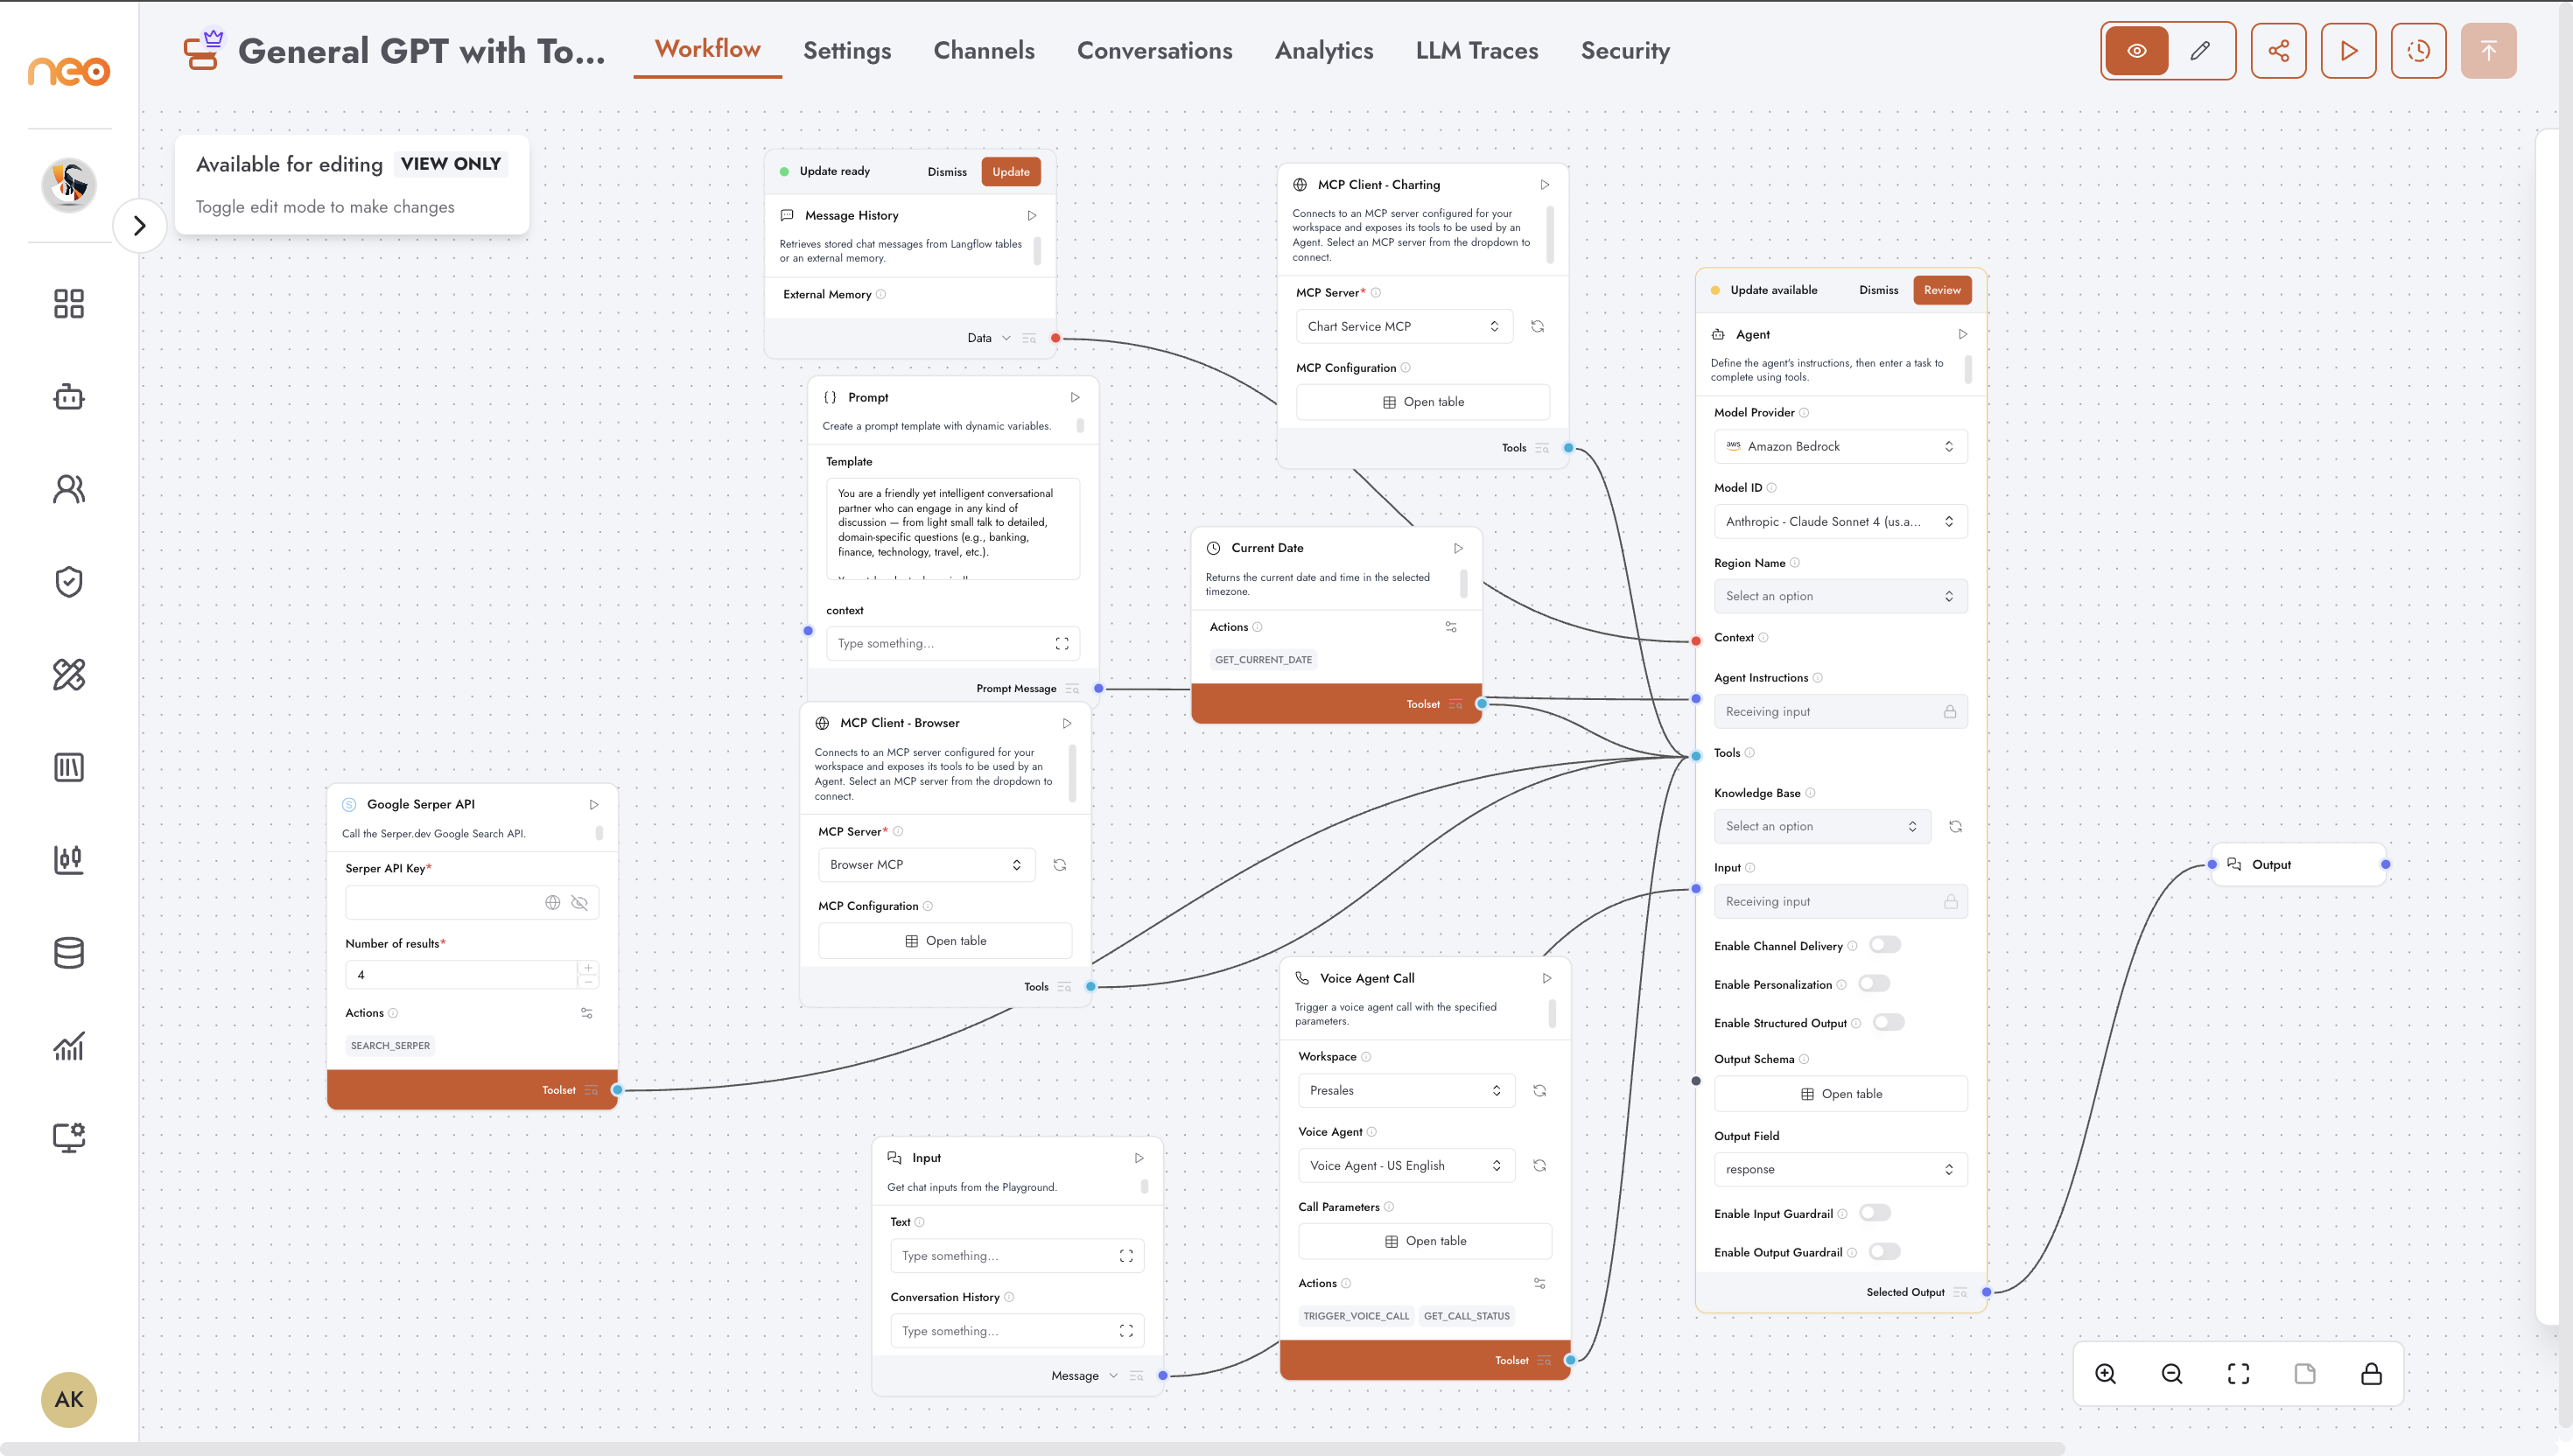
Canvas Areas
The editor has three main areas:
Canvas — the central workspace where you build the flow by placing and connecting component nodes. The canvas is infinite and pannable.
Component Sidebar — slides in from the right side. Lists all available components organised by category. Search for a component by name or browse by category. Each component can be dragged onto the canvas or double-clicked to add it at the centre.
Toolbar — appears along the bottom-right of the canvas with zoom, fit-to-view, lock/unlock, and Variables controls.
Header Tabs
The top navigation tabs for an Agentic Flow agent are:
Workflow — the canvas editor
Settings — flow configuration (name, description, global context, memory, execution permissions, output schema, KPIs)
Channels — deploy this agent to communication channels (WhatsApp, Slack, etc.)
Conversations — conversation history for this agent
Analytics — usage and cost metrics
LLM Traces — detailed logs of every LLM call made during conversations
API Access — code snippets and credentials for calling this agent via the OneByZero Neo API
Adding Components
There are two ways to add a component to the canvas:
Drag and drop — drag a component from the sidebar onto the canvas at the position you want.
Double-click — double-click a component in the sidebar to add it at the centre of the current view.
When you hover over a component card in the sidebar, a brief description appears. After placing a component, click it on the canvas to open its configuration panel inline.
Connecting Components
Each component exposes typed handles — coloured circles on the left (inputs) and right (outputs) edges of the node:
Drag from an output handle to an input handle on another component to create a connection (edge).
Handles are typed — the canvas highlights compatible handles when you start dragging, and prevents incompatible connections.
A single output can connect to multiple inputs. A single input accepts only one connection.
To delete a connection, click the edge and press Delete, or right-click the edge for options.
Component Sidebar
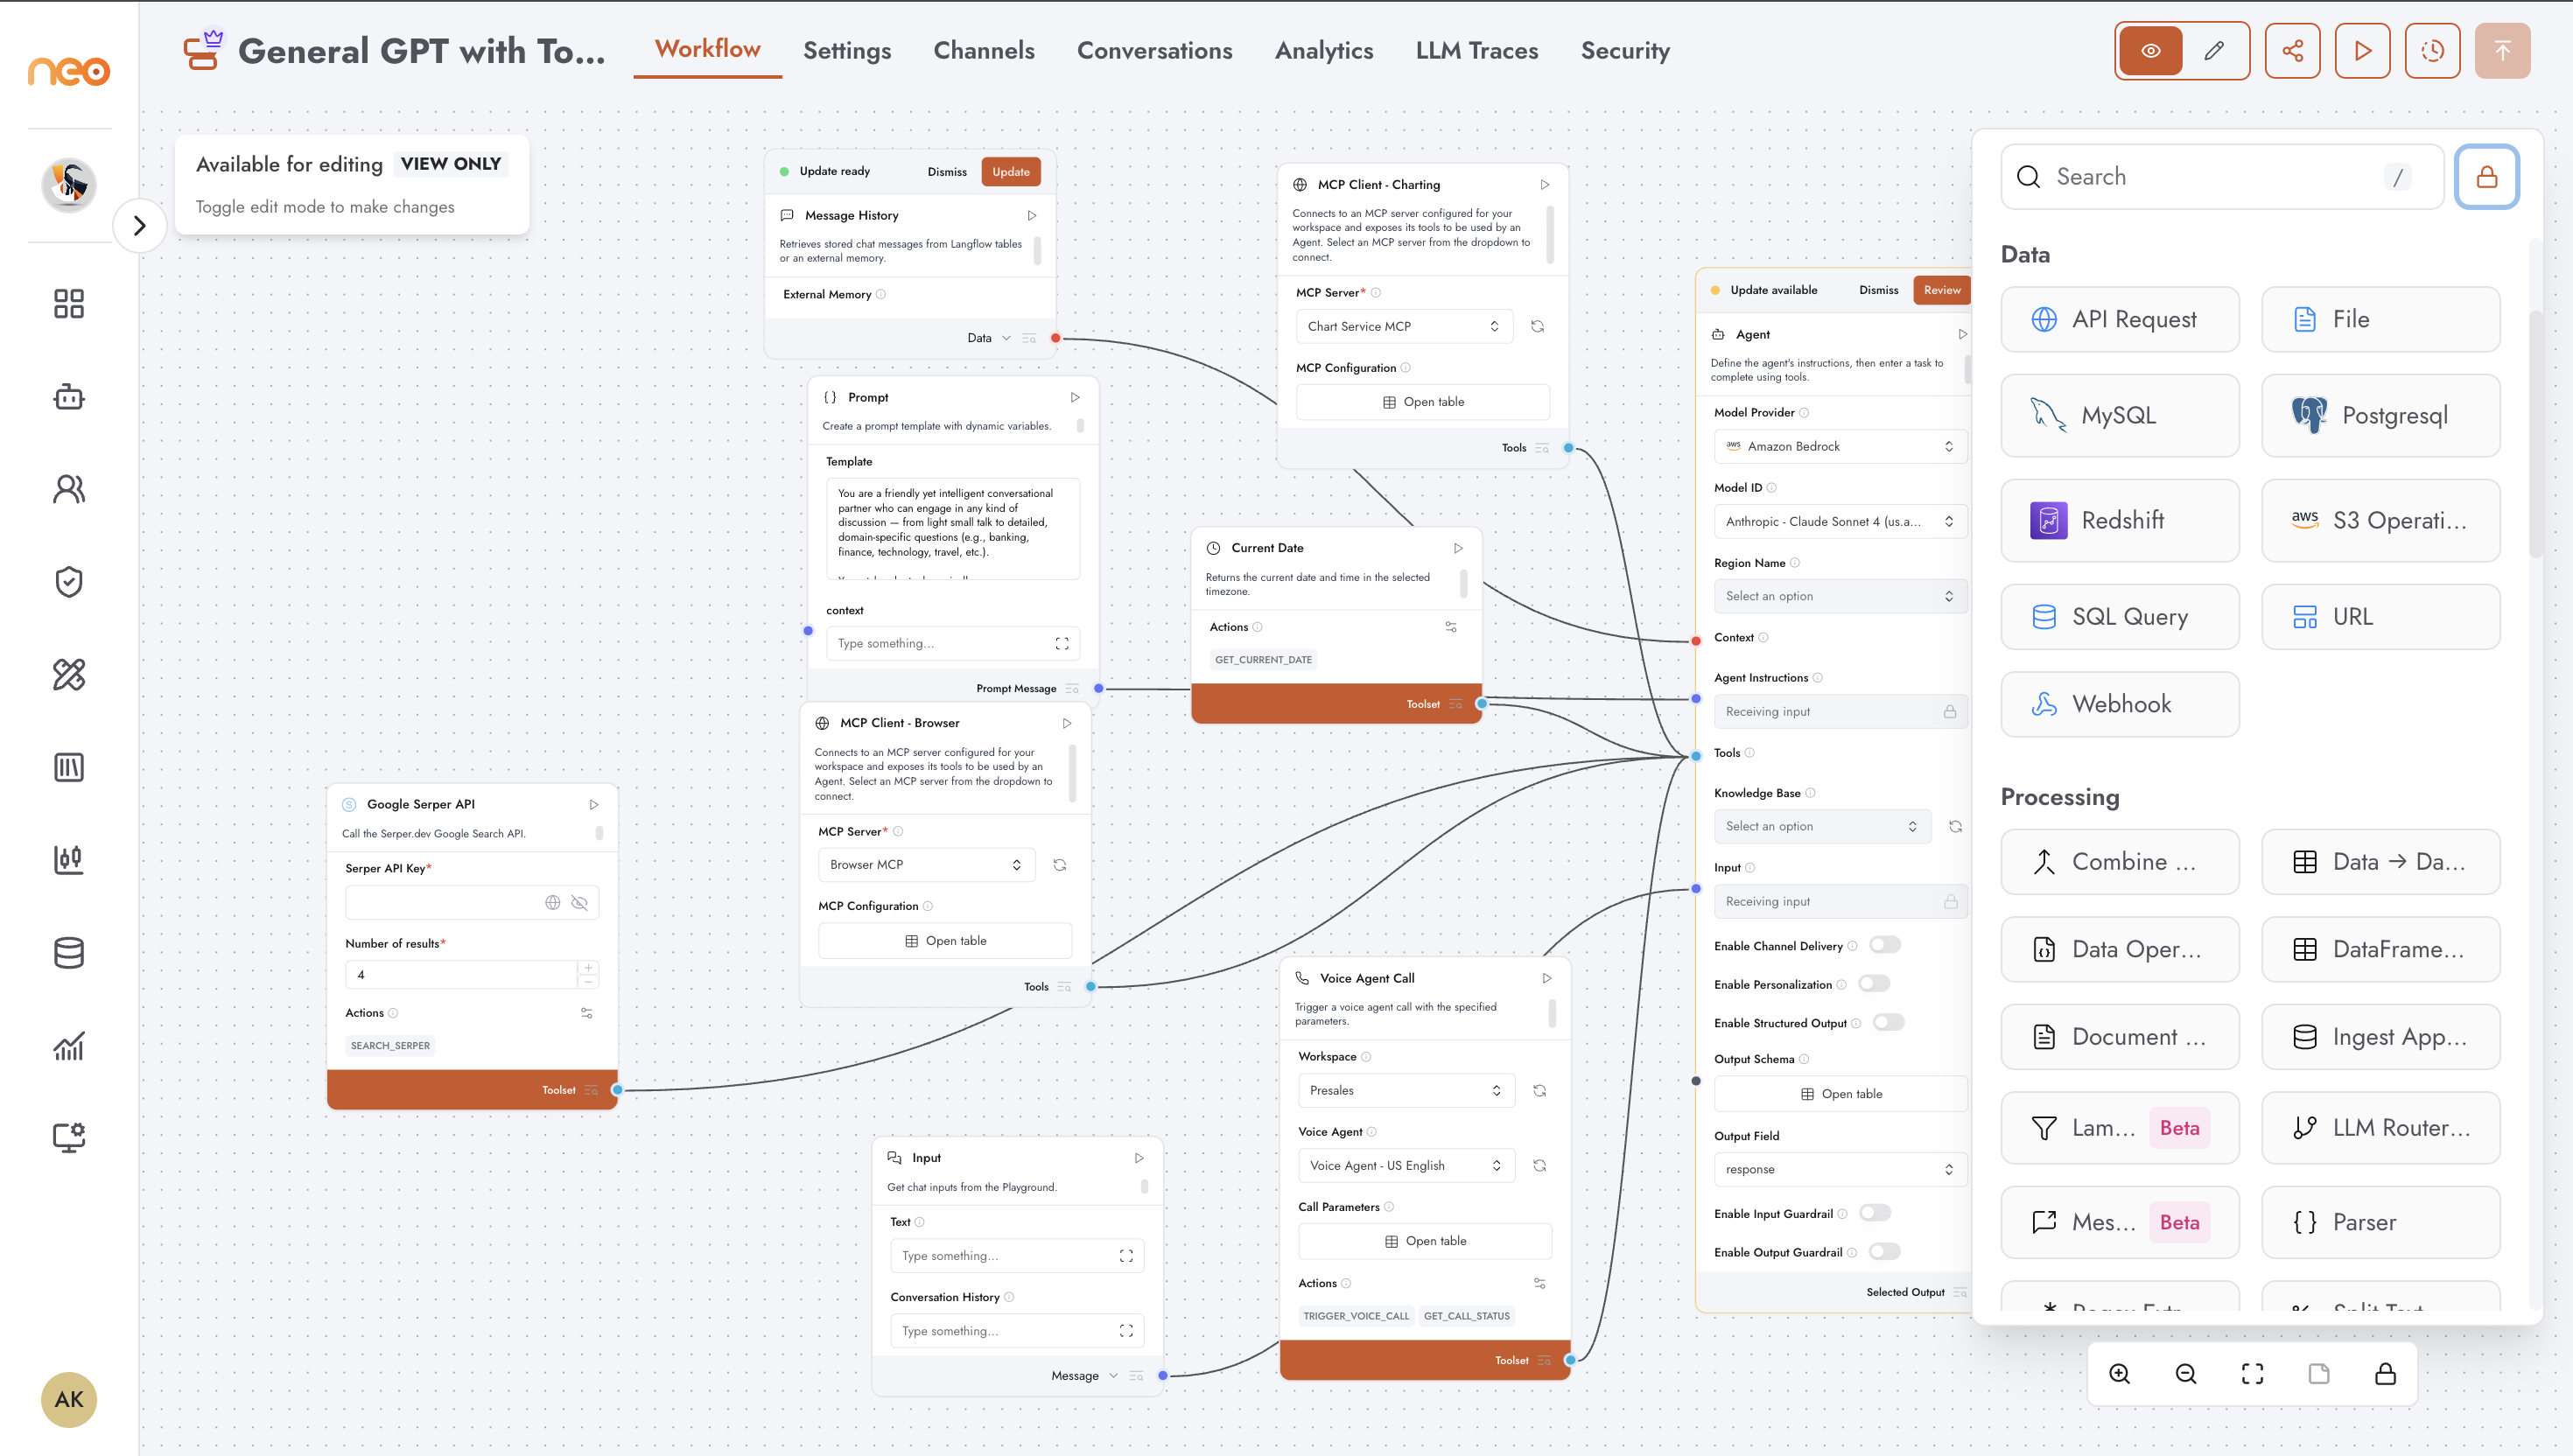
The sidebar is locked open by default. Click the lock/unlock icon at the top of the sidebar to make it auto-hide when the mouse leaves. When unlocked, hover over the narrow strip on the right edge of the canvas to bring the sidebar back.
The sidebar has a search field at the top. Type to fuzzy-search across all component names and descriptions. Results expand the matching categories automatically.
Edit Mode and Locking
The canvas operates in one of two interaction modes, toggled using the lock/unlock button in the bottom-right toolbar:
Unlocked (default) — nodes are draggable, edges can be created, and components can be configured. This is the editing state.
Locked — the canvas becomes read-only. Use this when reviewing a flow without risk of accidental edits.
Only one user can hold the edit lock at a time. The header shows who currently owns edit access. Users with sufficient permissions can take the lock from another user.
Versioning and Edit Mode
The version dropdown in the header shows the currently active version (e.g. v1.0). Click the version history button to browse past approved versions. Selecting a past version loads it in read-only mode; click Restore to make it the working draft.
Auto-Save
Changes to the canvas are saved automatically. The header shows the save status. Manual save is also available from the canvas toolbar.
Variables
Click the Variables button (braces icon) in the bottom-right canvas controls to open the Variables drawer. Variables are global key/value pairs available to all components in the flow. See Component Types for components that produce or consume variables.