The Voice Agent Editor
Creating a New Voice Agent
From the agent list, click New Agent and select Voice. Enter a name and description, then click Create. The agent settings page opens immediately.
Voice agents require configuration across several areas before they can be tested or published: the phone connection, speech-to-text transcription, text-to-speech synthesis, the language model, and call lifecycle rules. These are all set in the Settings tab.
Once the settings are in place, the Workflow tab provides a canvas — similar to the Chatbot Builder and Agentic Flow Builder — where you design the call flow as a stage-based conversation graph.
Header Tabs
The top navigation tabs for a Voice Agent are:
Workflow — the call flow canvas (stage-based conversation structure)
Settings — agent configuration (all sections)
Channels — deploy this agent to communication channels
Schedule — configure outbound call campaigns with CSV contact lists
Simulations — run chat or voice simulations against the current configuration
Conversations — call history with transcripts and recordings
Analytics — usage and cost metrics
LLM Traces — detailed logs of every LLM call made during calls
API Access — code snippets and credentials for calling this agent via the OneByZero Neo API
Agent Settings
The Settings tab uses a scrollable left-side navigation. All sections are saved together when you click Update Agent in the top-right corner.
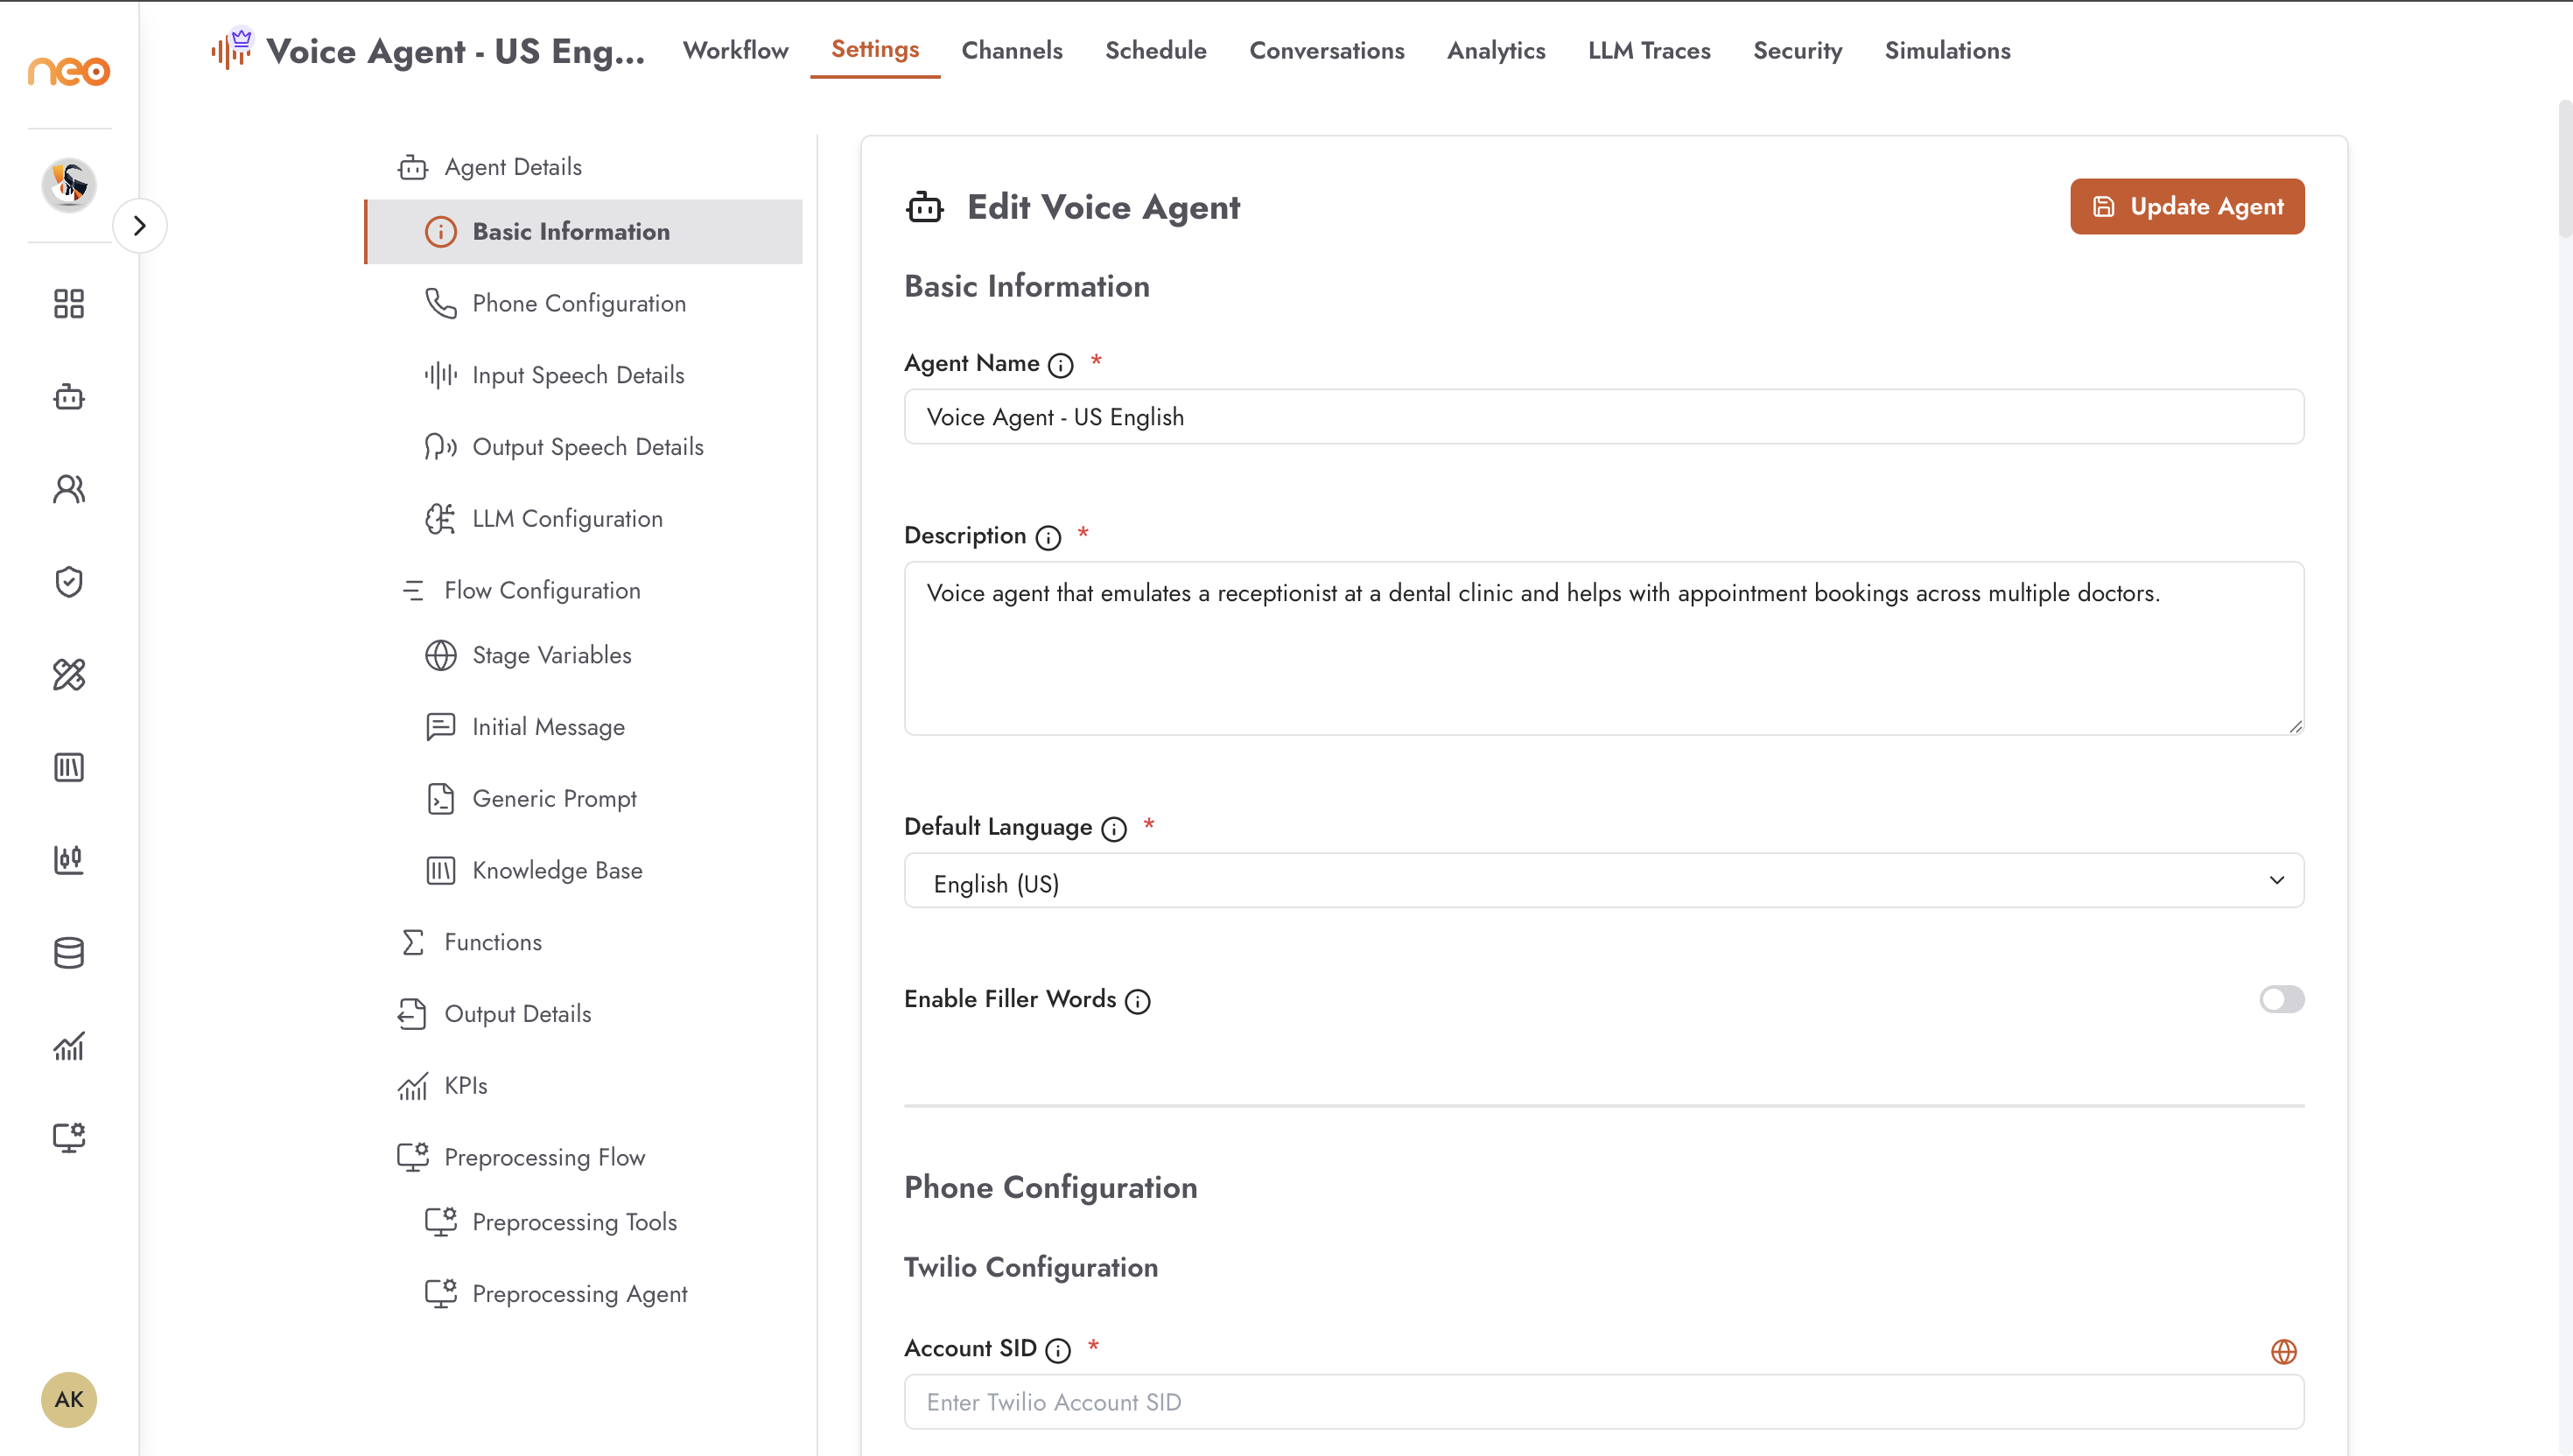
Basic Information
The basic information section defines the agent’s identity and language behaviour.
Agent Name and Description are display fields shown in the agent list and header. Both are required.
Default Language sets the primary language for this agent — used as the baseline for transcription and synthesis when no other language is detected. Choose from the dropdown (English, Vietnamese, Indonesian, Thai, Mandarin Chinese, Malay, Tamil, Telugu, Filipino, Arabic, and others).
Enable Filler Words inserts natural filler sounds such as “hmm” or “let me check” during the gap between the caller finishing and the agent replying. This reduces the perception of dead silence. Off by default.
Phone Configuration
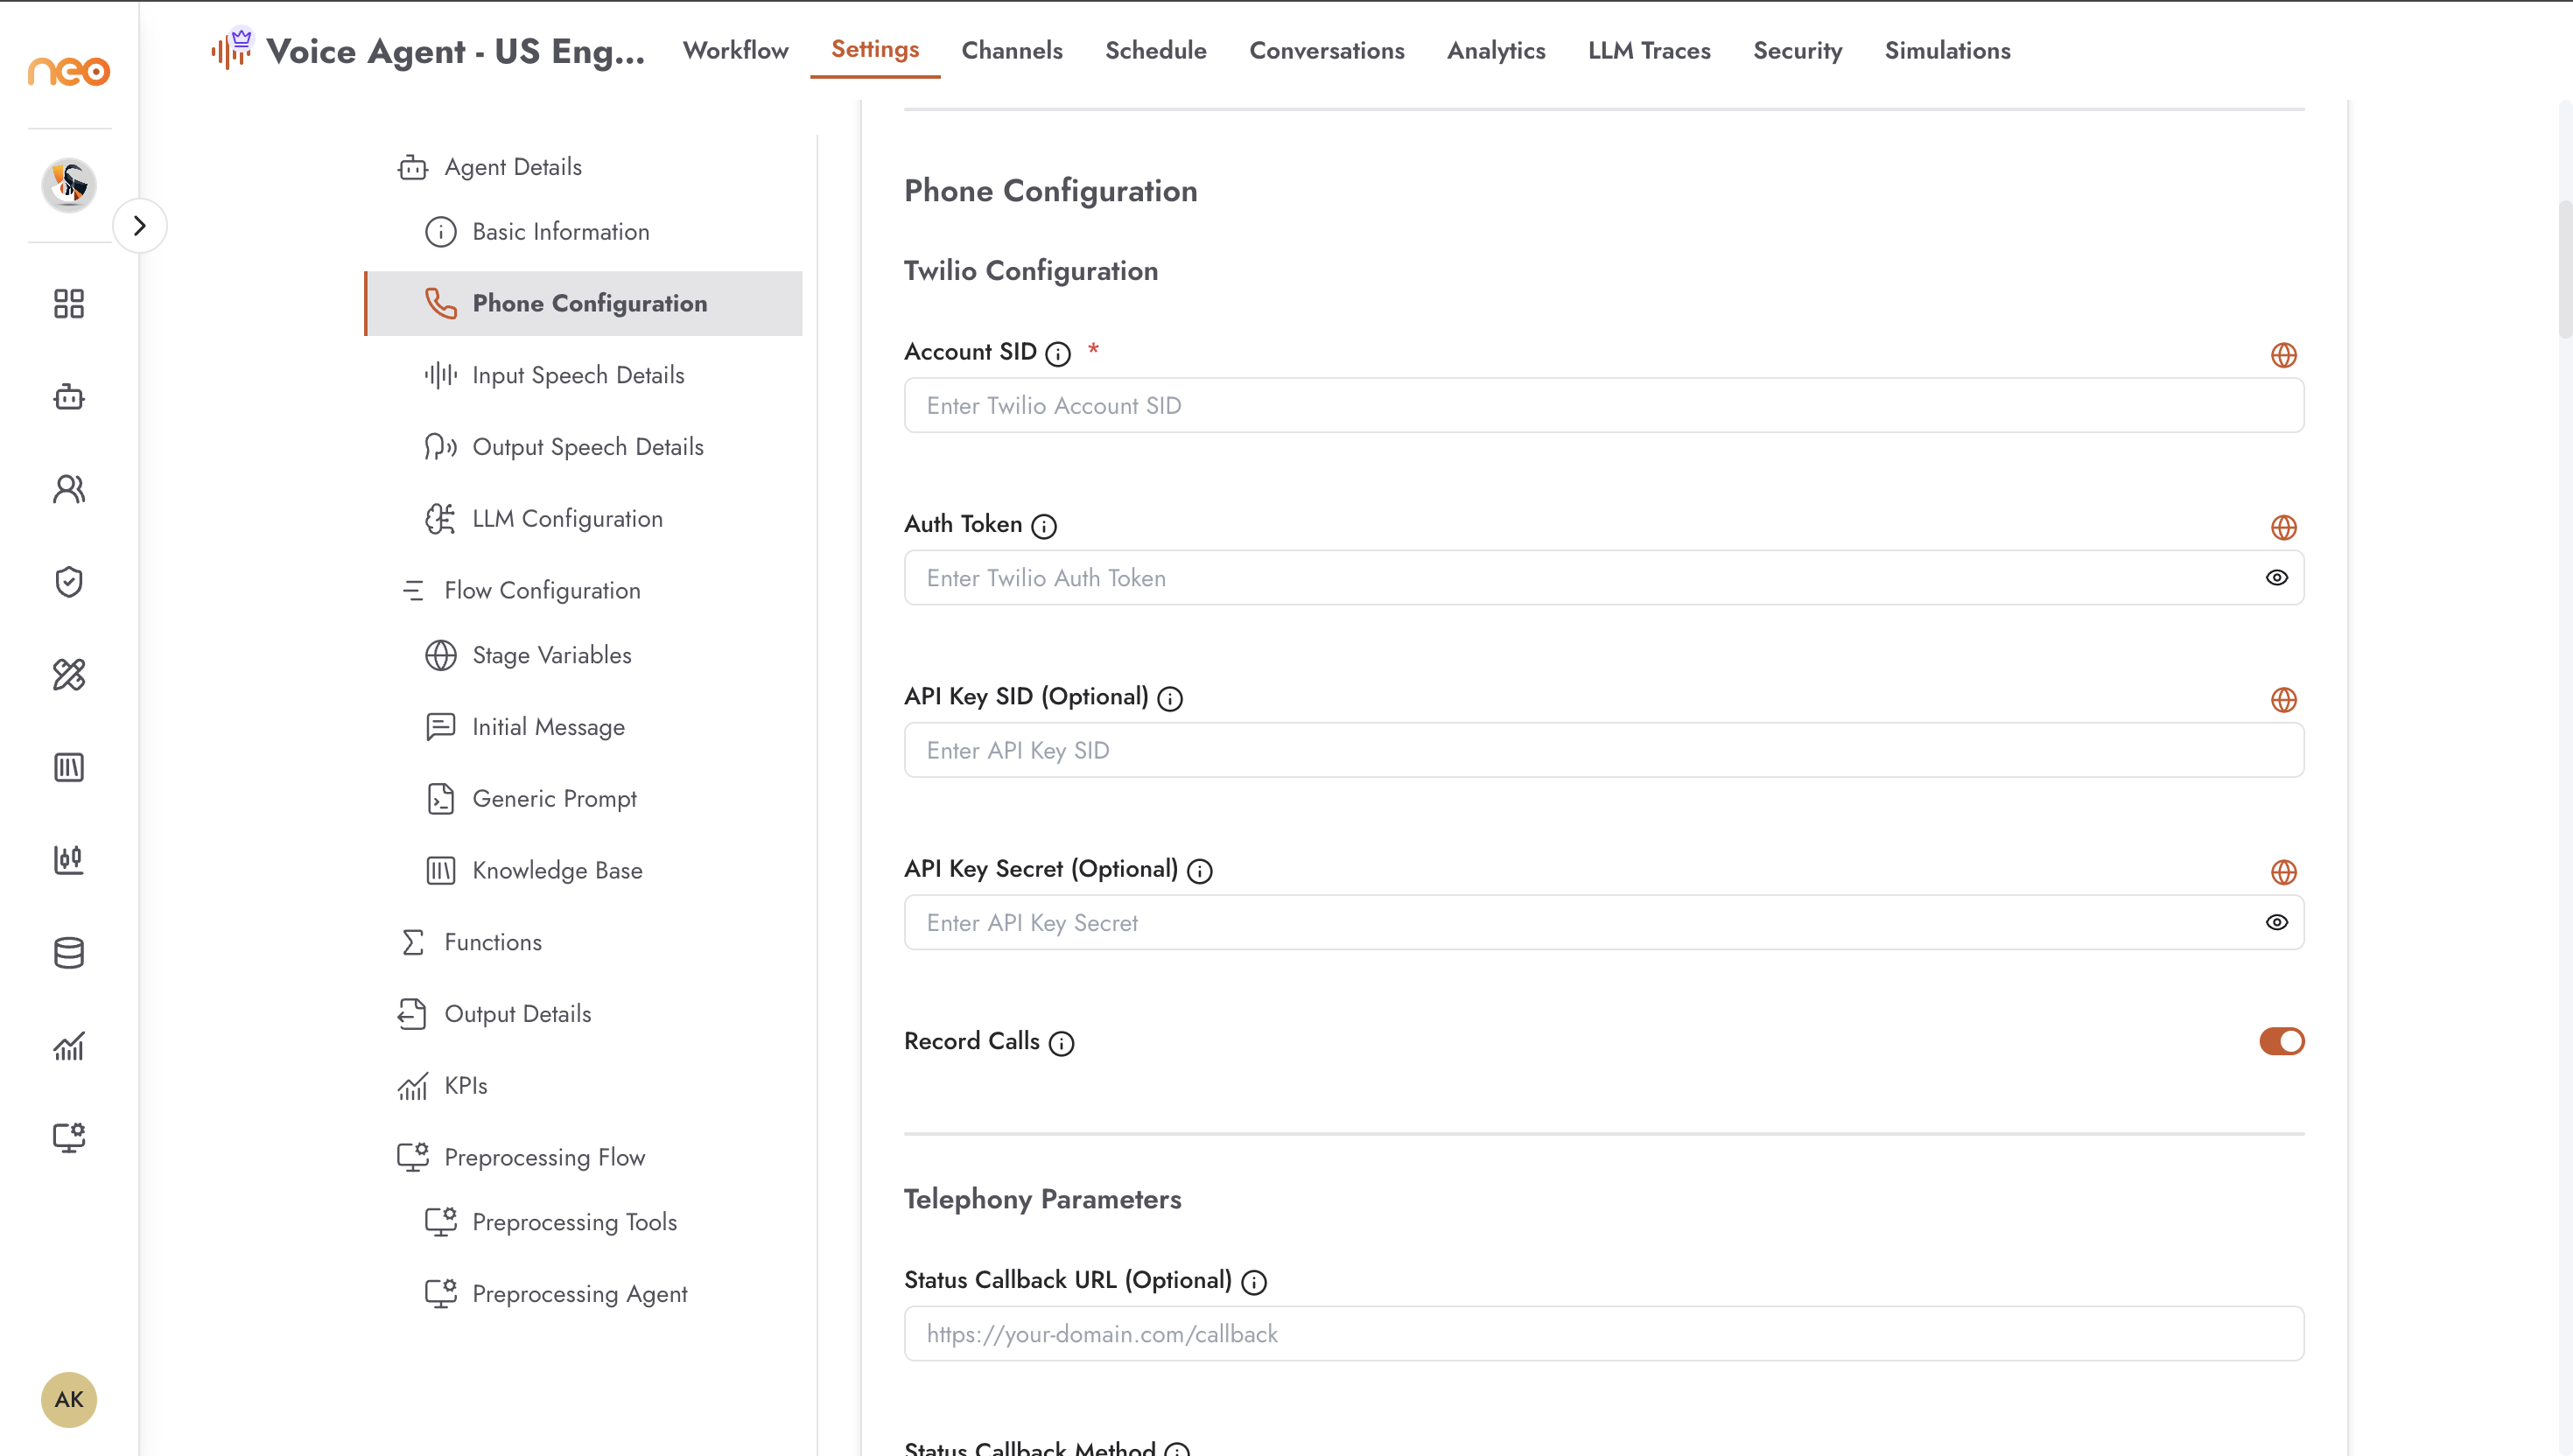
The phone configuration section connects the agent to a phone number and its underlying telephony provider.
Credentials — provide your Account SID and either an Auth Token or a pair of API Key SID + API Key Secret. The Account SID identifies your account; the auth credentials authorise the platform to place and receive calls on your behalf.
Record Calls — toggle to capture audio recordings of every call. Recordings are then available in the Conversations tab.
Status Callback URL and Events — if your system needs to be notified when a call changes state, enter a callback URL and select which events should trigger it: Initiated, Ringing, Answered, Completed.
BYOC (Bring Your Own Carrier) — if you are routing calls through your own SIP carrier rather than the default telephony network, enter your BYOC trunk SID (format BY...).
Extra Parameters — additional key/value pairs sent with each call request. Use these for region or edge routing (e.g. region = us1, edge = sydney). Click Add to insert a row; remove a row with the trash icon.
Phone Number — the full E.164 phone number assigned to this agent (e.g. +1234567890). Required.
Phone Type — select Inbound if the agent answers incoming calls, or Outbound if the agent places calls to a contact list. This determines how the platform routes the telephony connection.
Call Termination Configuration
The call termination section controls when the agent ends a call automatically, without waiting for the natural end of a conversation.
Terminate Call on Keyword — when enabled, the agent monitors the transcription stream for specific words or phrases. As soon as one is detected, the call is ended immediately. This is useful for explicit farewell phrases that indicate the caller is done.
Termination Keywords — enter a comma-separated list of words or phrases (e.g. goodbye, bye, end call). The match is case-insensitive. This field is only visible when the toggle is on.
Input Speech Details (STT)
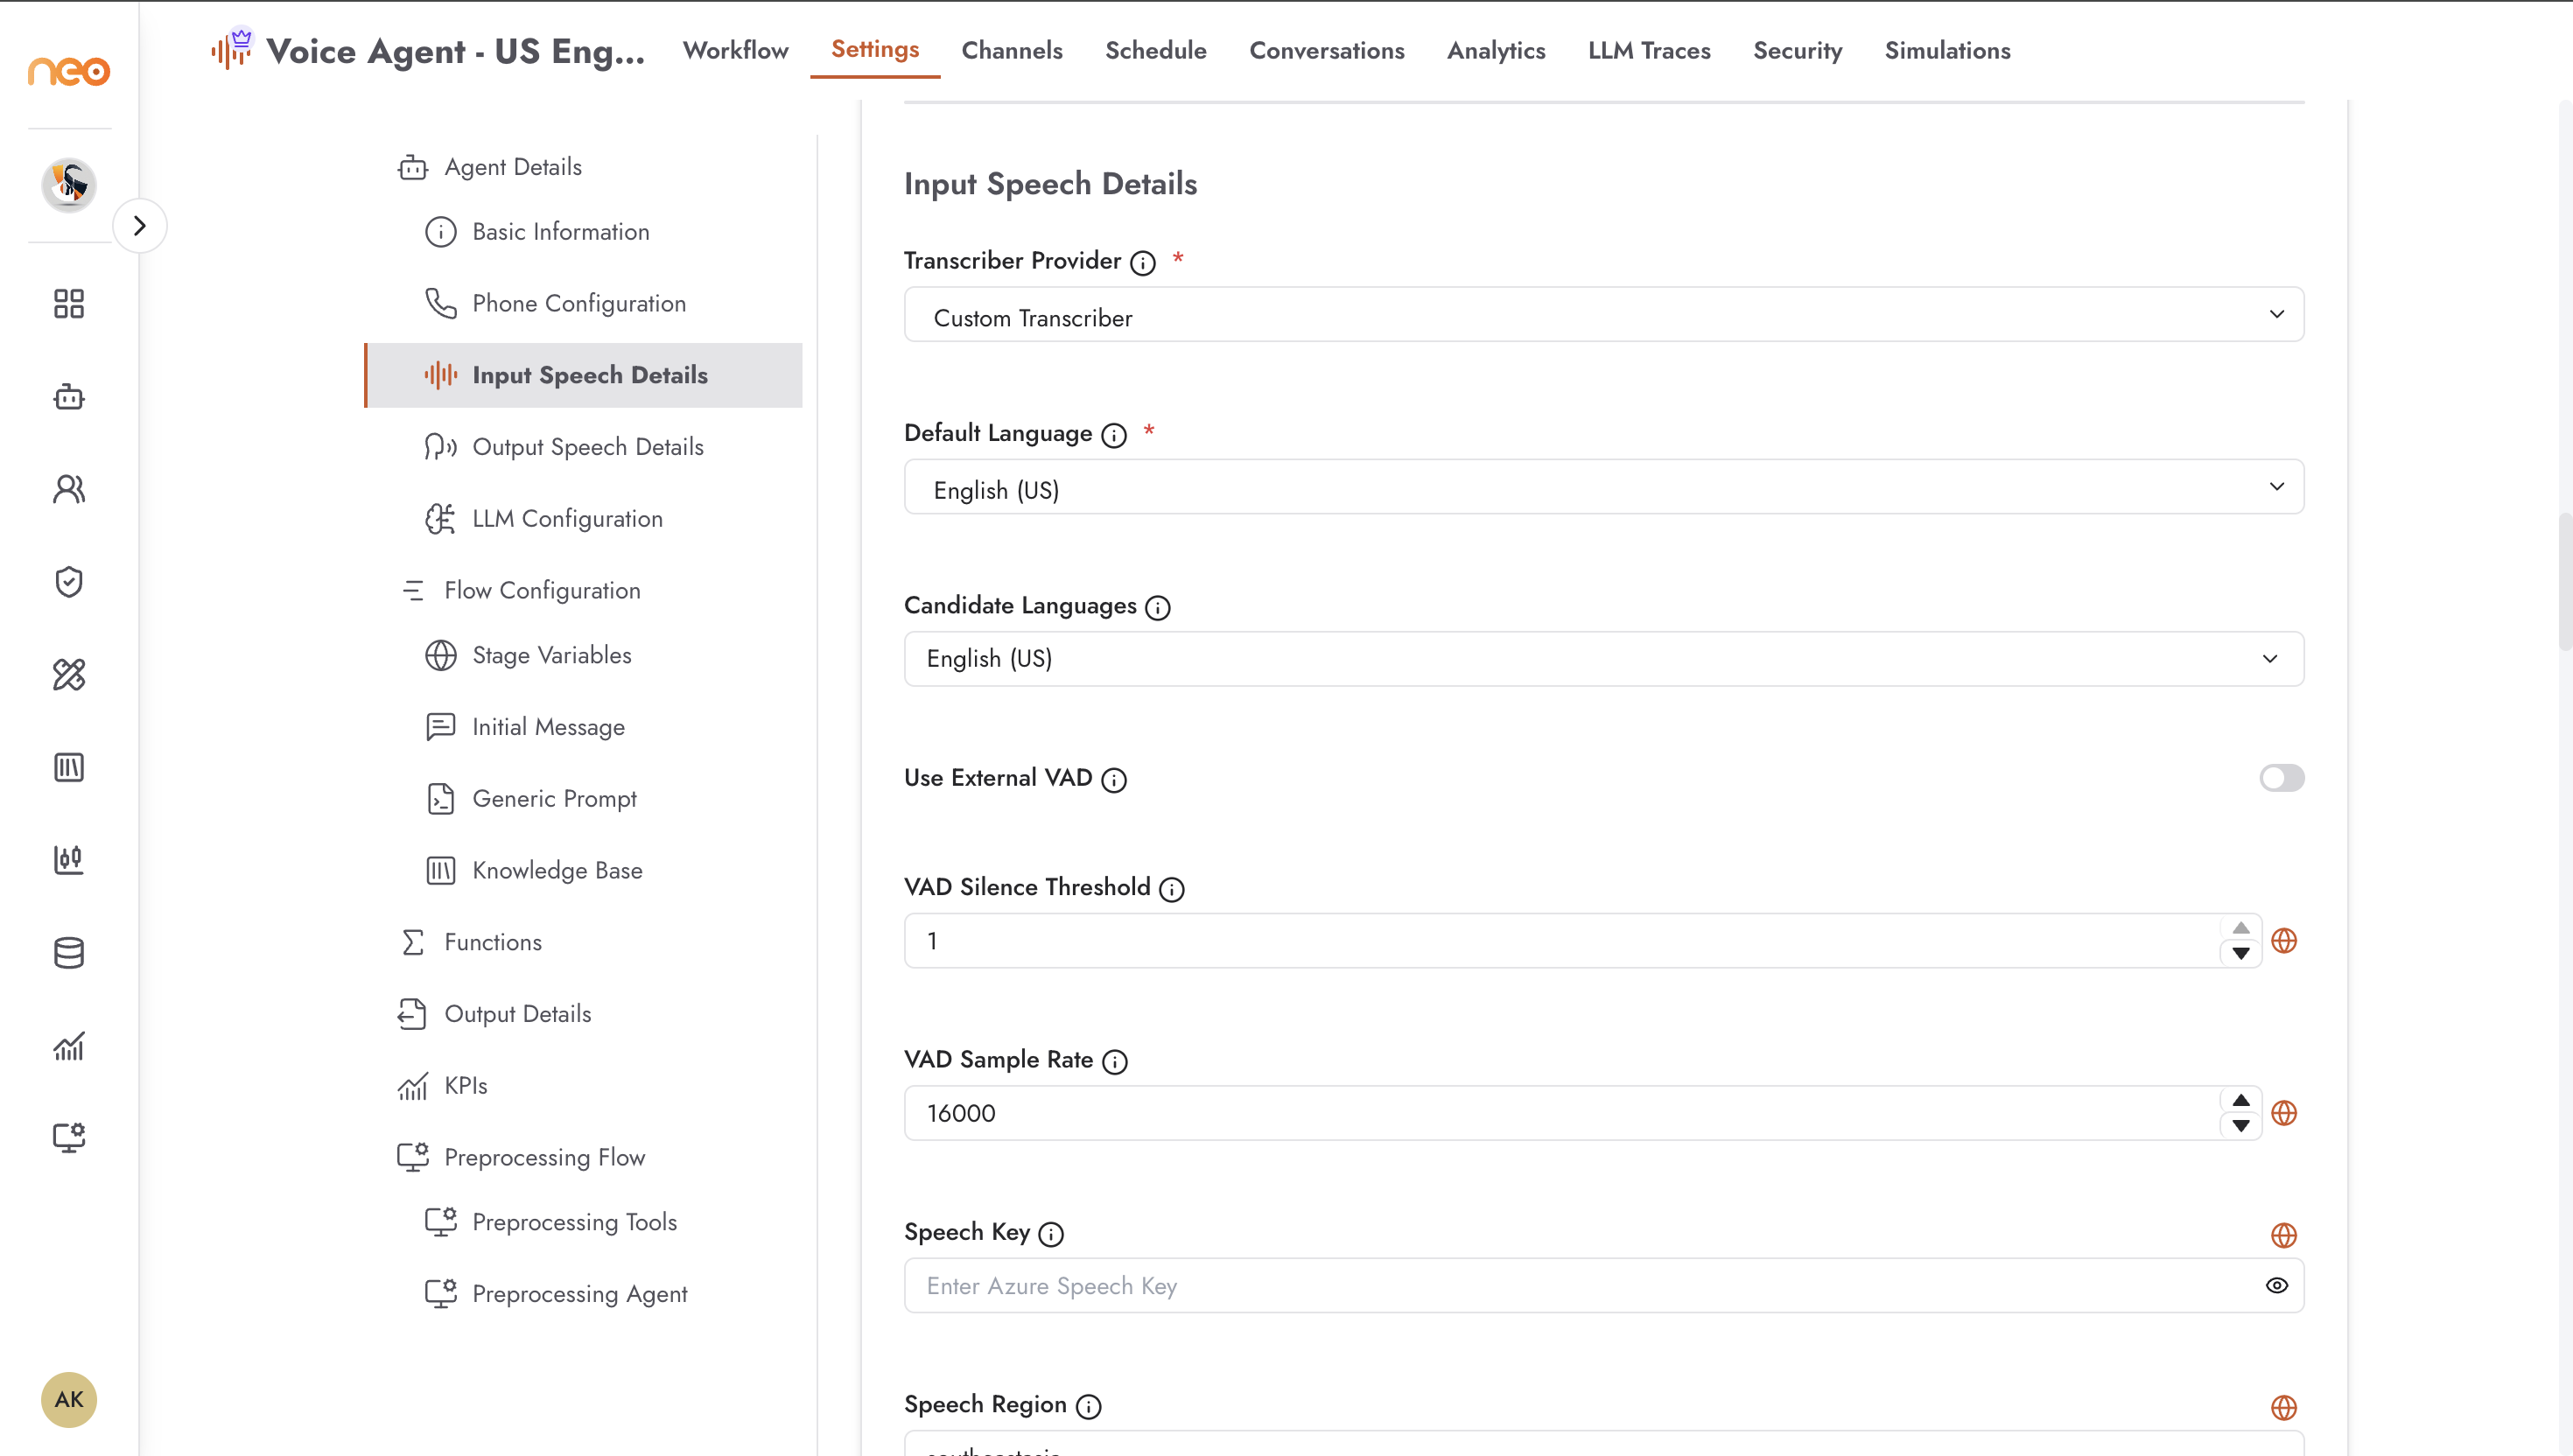
The input speech section configures how the agent transcribes what the caller says. Select the Transcriber from the dropdown; the form updates to show only the fields for the chosen provider.
The transcriber runs in real time — it processes the audio stream from the caller and produces a text transcript that is passed to the language model.
Available providers:
Whisper — Self-hosted transcription using a Whisper model served via a Ray Serve endpoint. Requires a Whisper Ray URL. Suitable when you need an on-premise or private transcription service.
Custom Transcriber — Connects to a configurable external speech transcription service using a speech key and region.
AWS Transcriber — Amazon Transcribe streaming. Supports automatic language detection across multiple candidate languages.
Deepgram — Deepgram real-time streaming API. Supports on-premise deployments via a custom WebSocket URL.
ElevenLabs — ElevenLabs real-time speech-to-text. Includes automatic language detection and configurable VAD (Voice Activity Detection) sensitivity.
See Configuration Reference for the full field reference for each provider.
Output Speech Details (TTS)
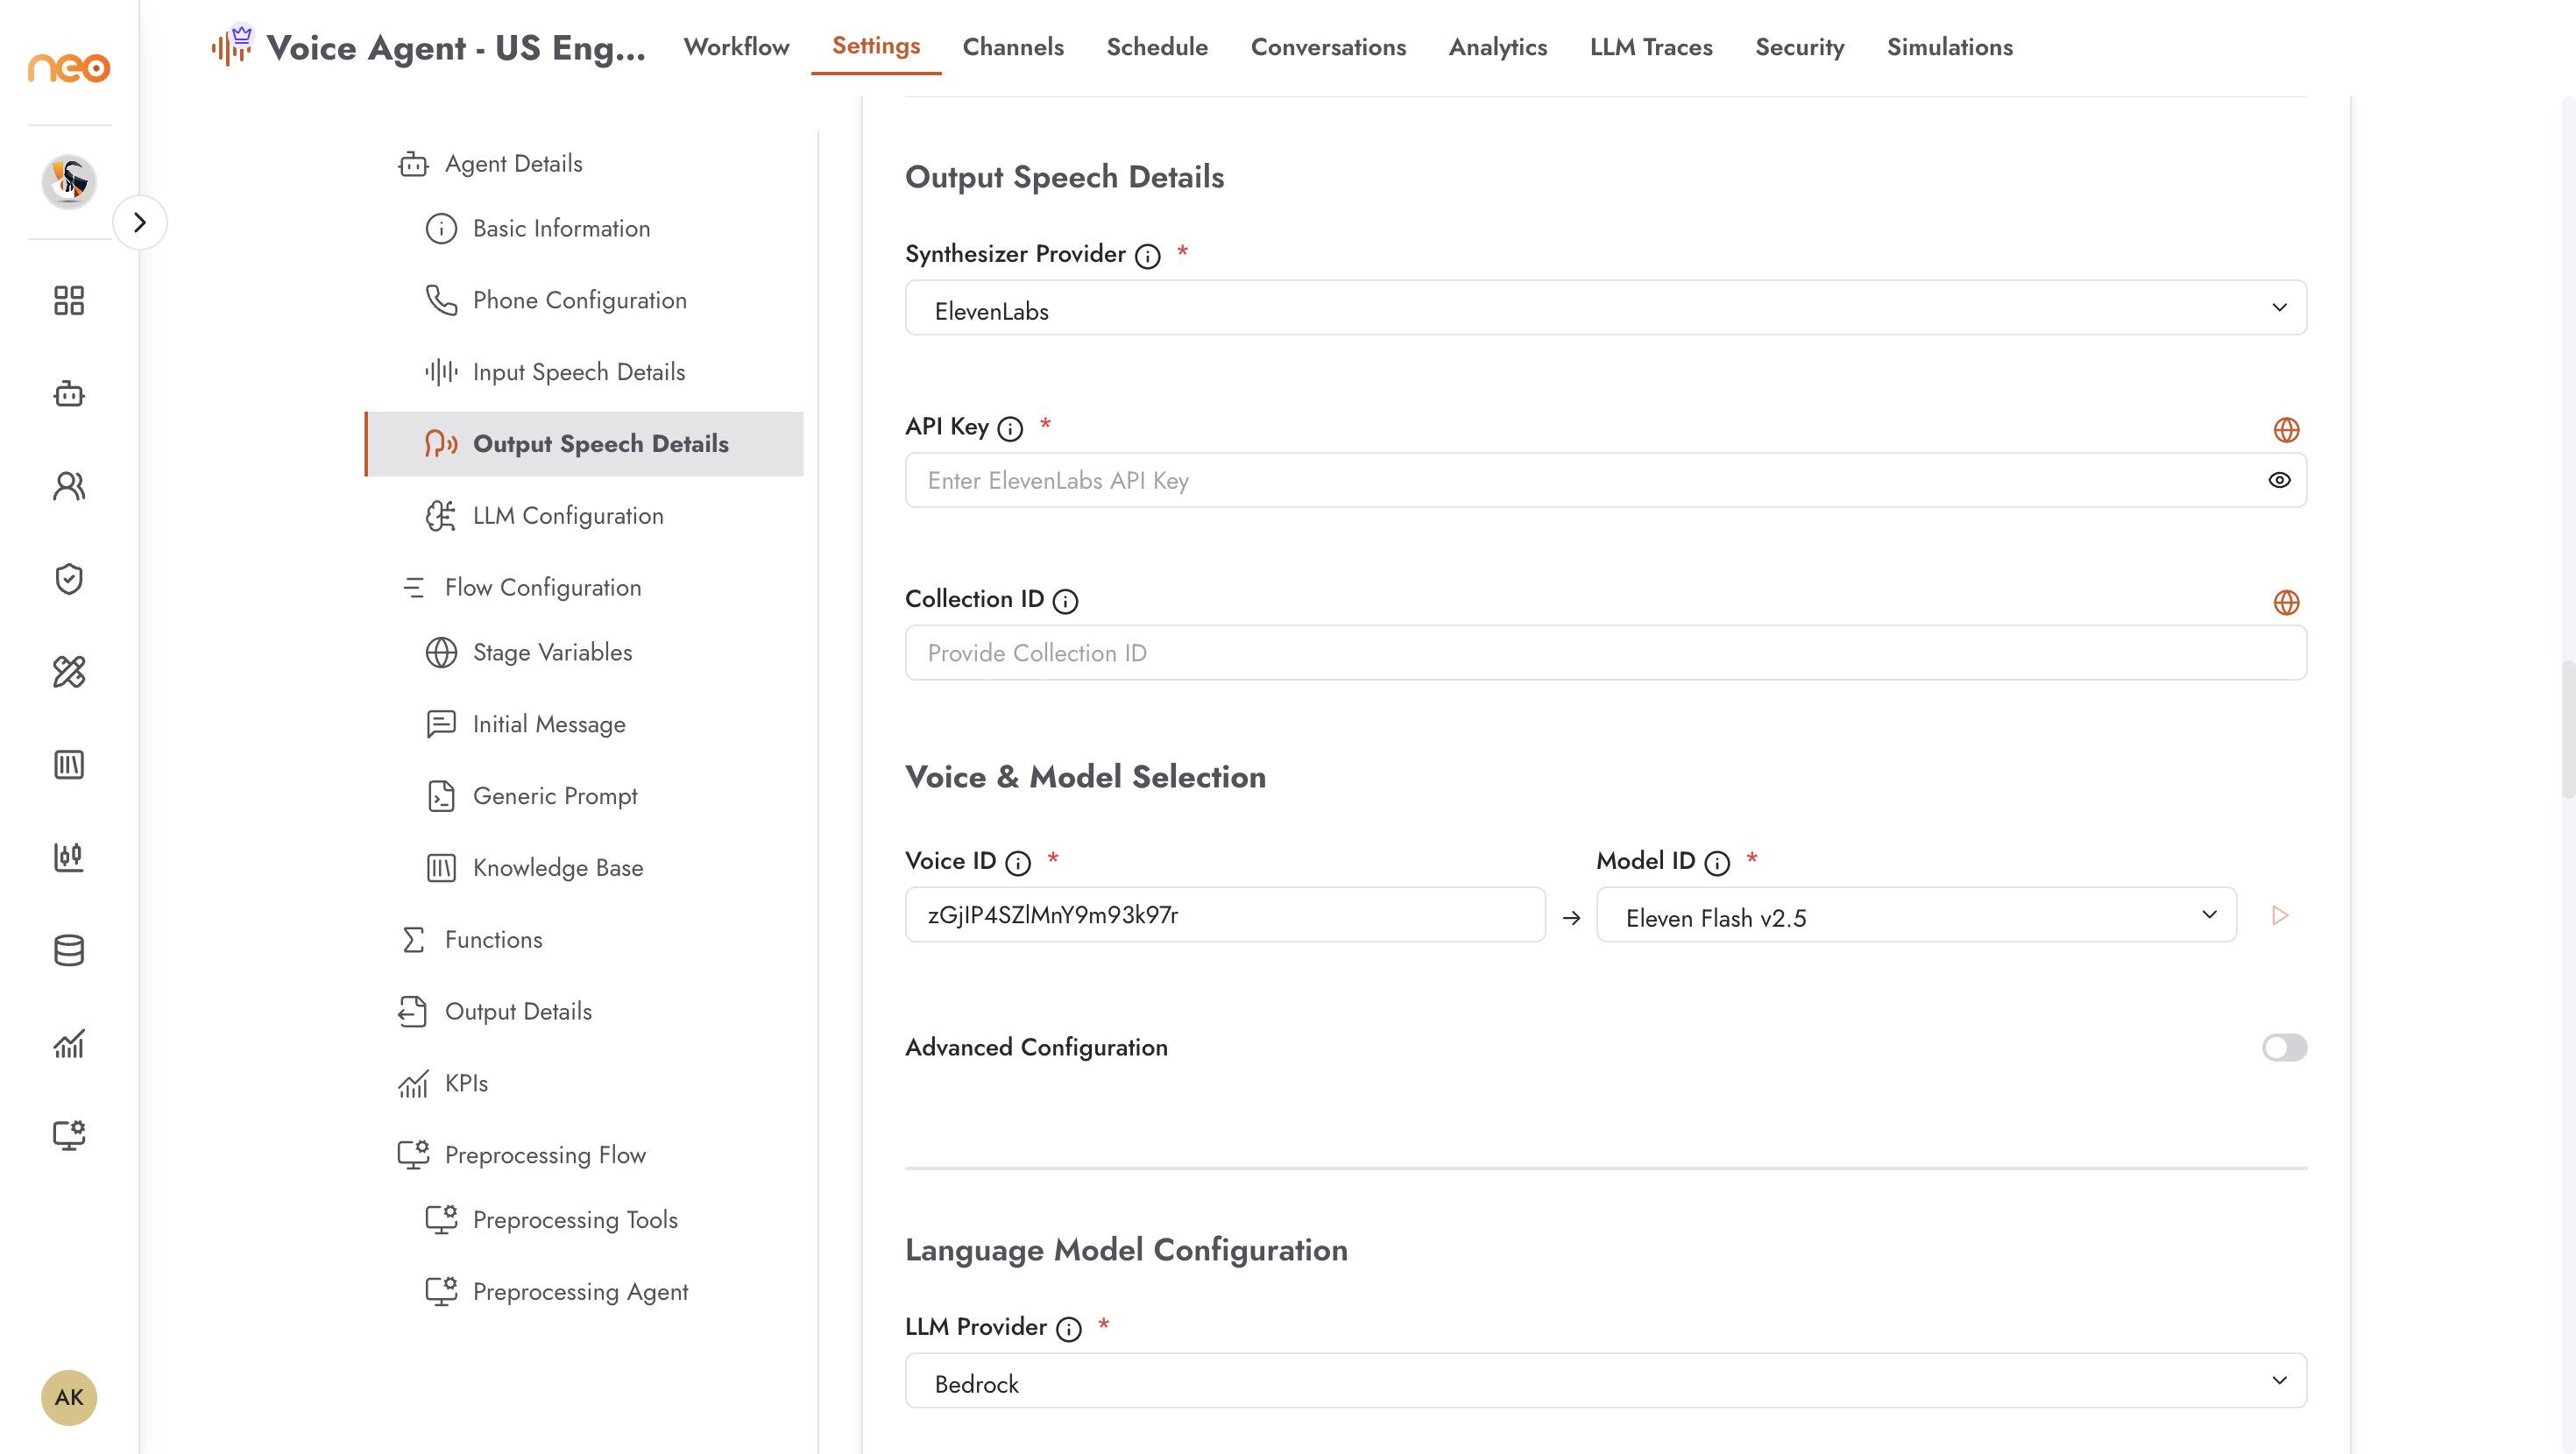
The output speech section configures how the agent’s text responses are converted to audio and played back to the caller. Select the Synthesizer from the dropdown.
The synthesiser takes the language model’s text output and generates natural-sounding speech in real time, streaming it back to the caller with minimal latency.
Available providers:
ElevenLabs — High-quality neural voice synthesis. Requires an API key and a Voice ID. Supports a range of models from ultra-low-latency (Flash) to high-quality multilingual (Multilingual v2). Advanced settings allow fine-tuning of stability, speed, style, and similarity to the original voice.
AWS Polly — Amazon Polly neural and standard voice synthesis. Select the language, engine (Neural recommended), and voice from the available options for that language.
See Configuration Reference for the full field reference for each provider.
Language Model Configuration
The language model section configures the LLM that reasons over the conversation and generates the agent’s responses. Select the LLM Provider from the dropdown.
The LLM receives the transcribed caller input, the agent’s system prompt, any relevant context from the call flow, and produces the next agent response as text.
Available providers:
Bedrock — Amazon Bedrock (default). Configure the AWS region, model provider (e.g.
amazon,anthropic), and model ID. Supports both Boto3 and Langchain client types.Custom LLM1 — A configurable external LLM endpoint. Provide an API key and select the model.
Custom LLM2 — A second configurable external LLM endpoint. Provide an API key, endpoint URL, deployment name, model name, and API version.
See Configuration Reference for the full field reference for each provider.
Saving Changes
Click Update Agent in the top-right corner to save all sections at once. Validation errors appear inline on the relevant fields; a toast notification is shown if submission fails.
The Workflow Canvas
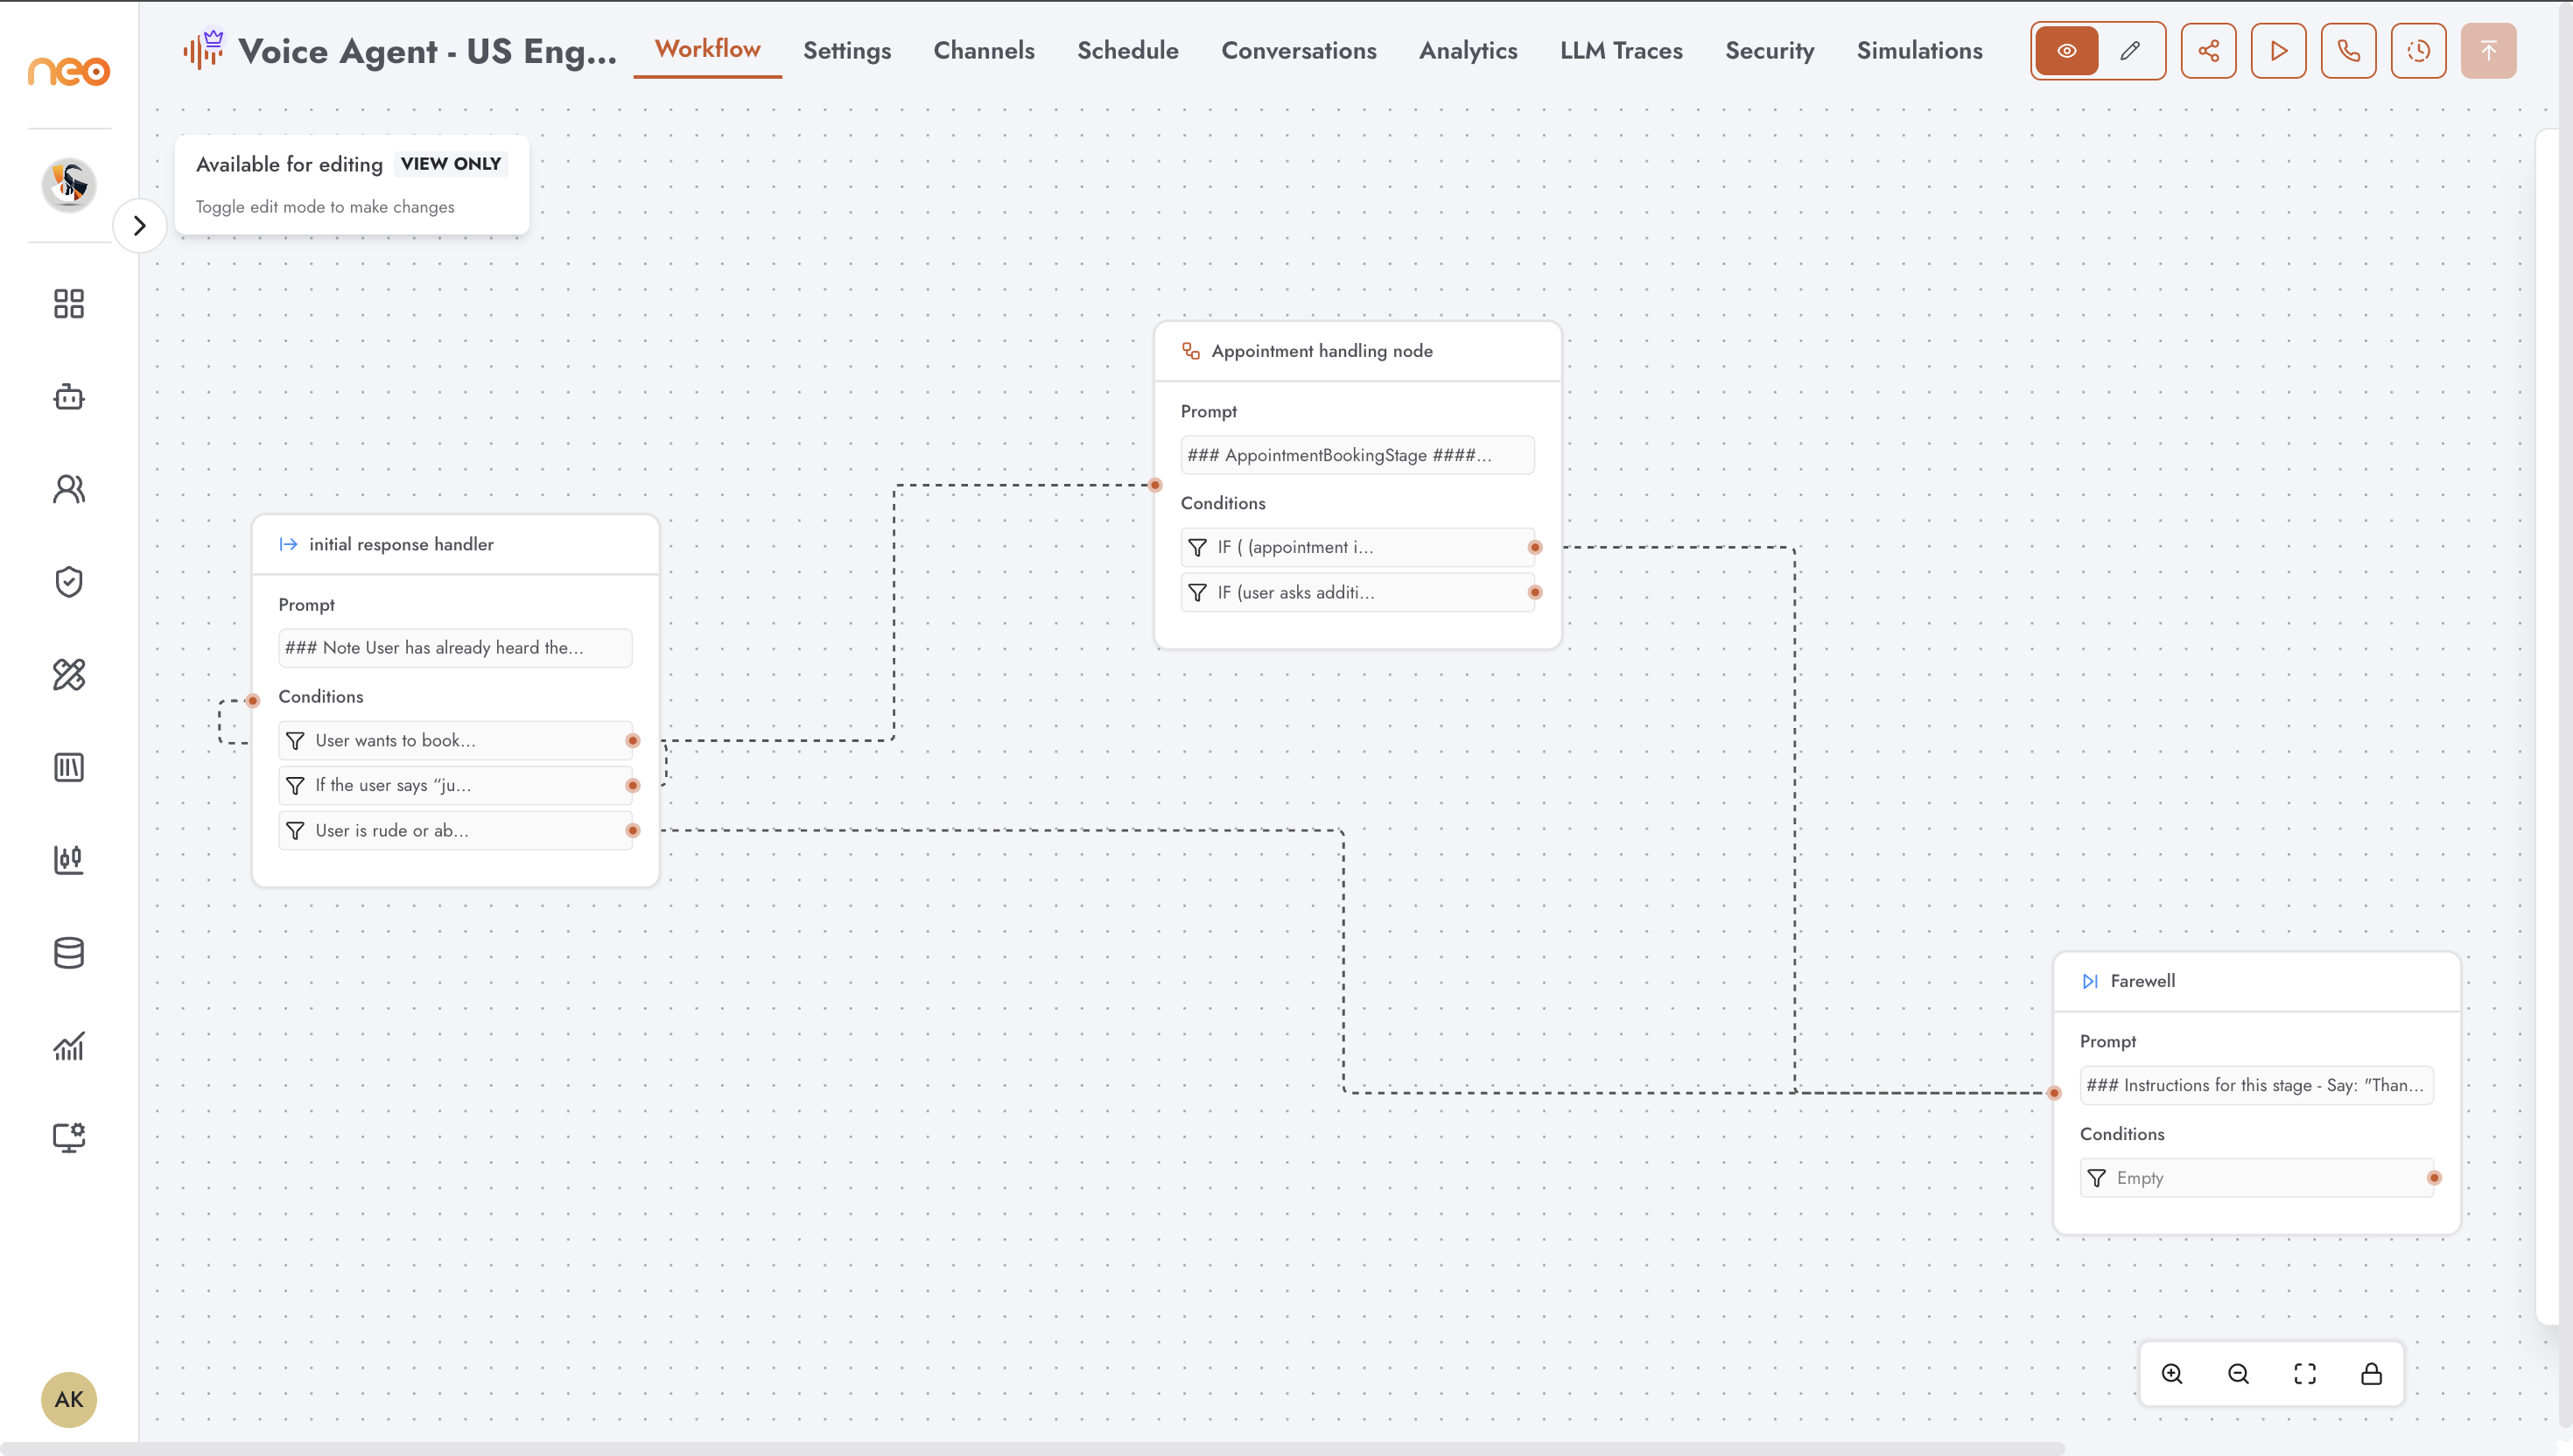
Once the agent configuration is complete, the Workflow tab provides a canvas for designing the call conversation structure. This is a stage-based graph editor — similar in concept to the Agentic Flow Builder canvas — where each node represents a step in the call (greeting, intent collection, escalation, closure) and edges define transitions between stages.
Stage-level configuration — such as the initial message the agent speaks when a call connects, the system prompt, stage variables, and functions — is set within the canvas or in the Flow Configuration sub-sections of the Settings tab.
For a full description of every stage type and inhouse action, see Workflow Stages.
Edit Mode and Locking
Only one user can hold the edit lock at a time. The header shows the current lock status and who owns edit access. Users with sufficient permissions can take the lock from another user. When the agent is in Pending Approval or Approved status, the settings and canvas are read-only.
Versioning
The version dropdown in the header shows the currently active version. Click the version history icon to browse past approved versions. Selecting a past version loads it in read-only mode; click Restore to make it the working draft.