Workspace Administrator
The Workspace Administrator is responsible for managing a specific workspace within OneByZero Neo. Unlike Super Administrators who have platform-wide authority, Workspace Administrators focus on their assigned workspace, controlling who can access it, what permissions they have, and managing workspace-specific configuration such as variables and secrets.
Workspace Administrators access their management functions through Workspace Settings, which provides a centralized interface for all workspace-level administrative tasks organized into several tabs: Workspace, Members, Roles, Variables, and Secrets.
Workspace Management
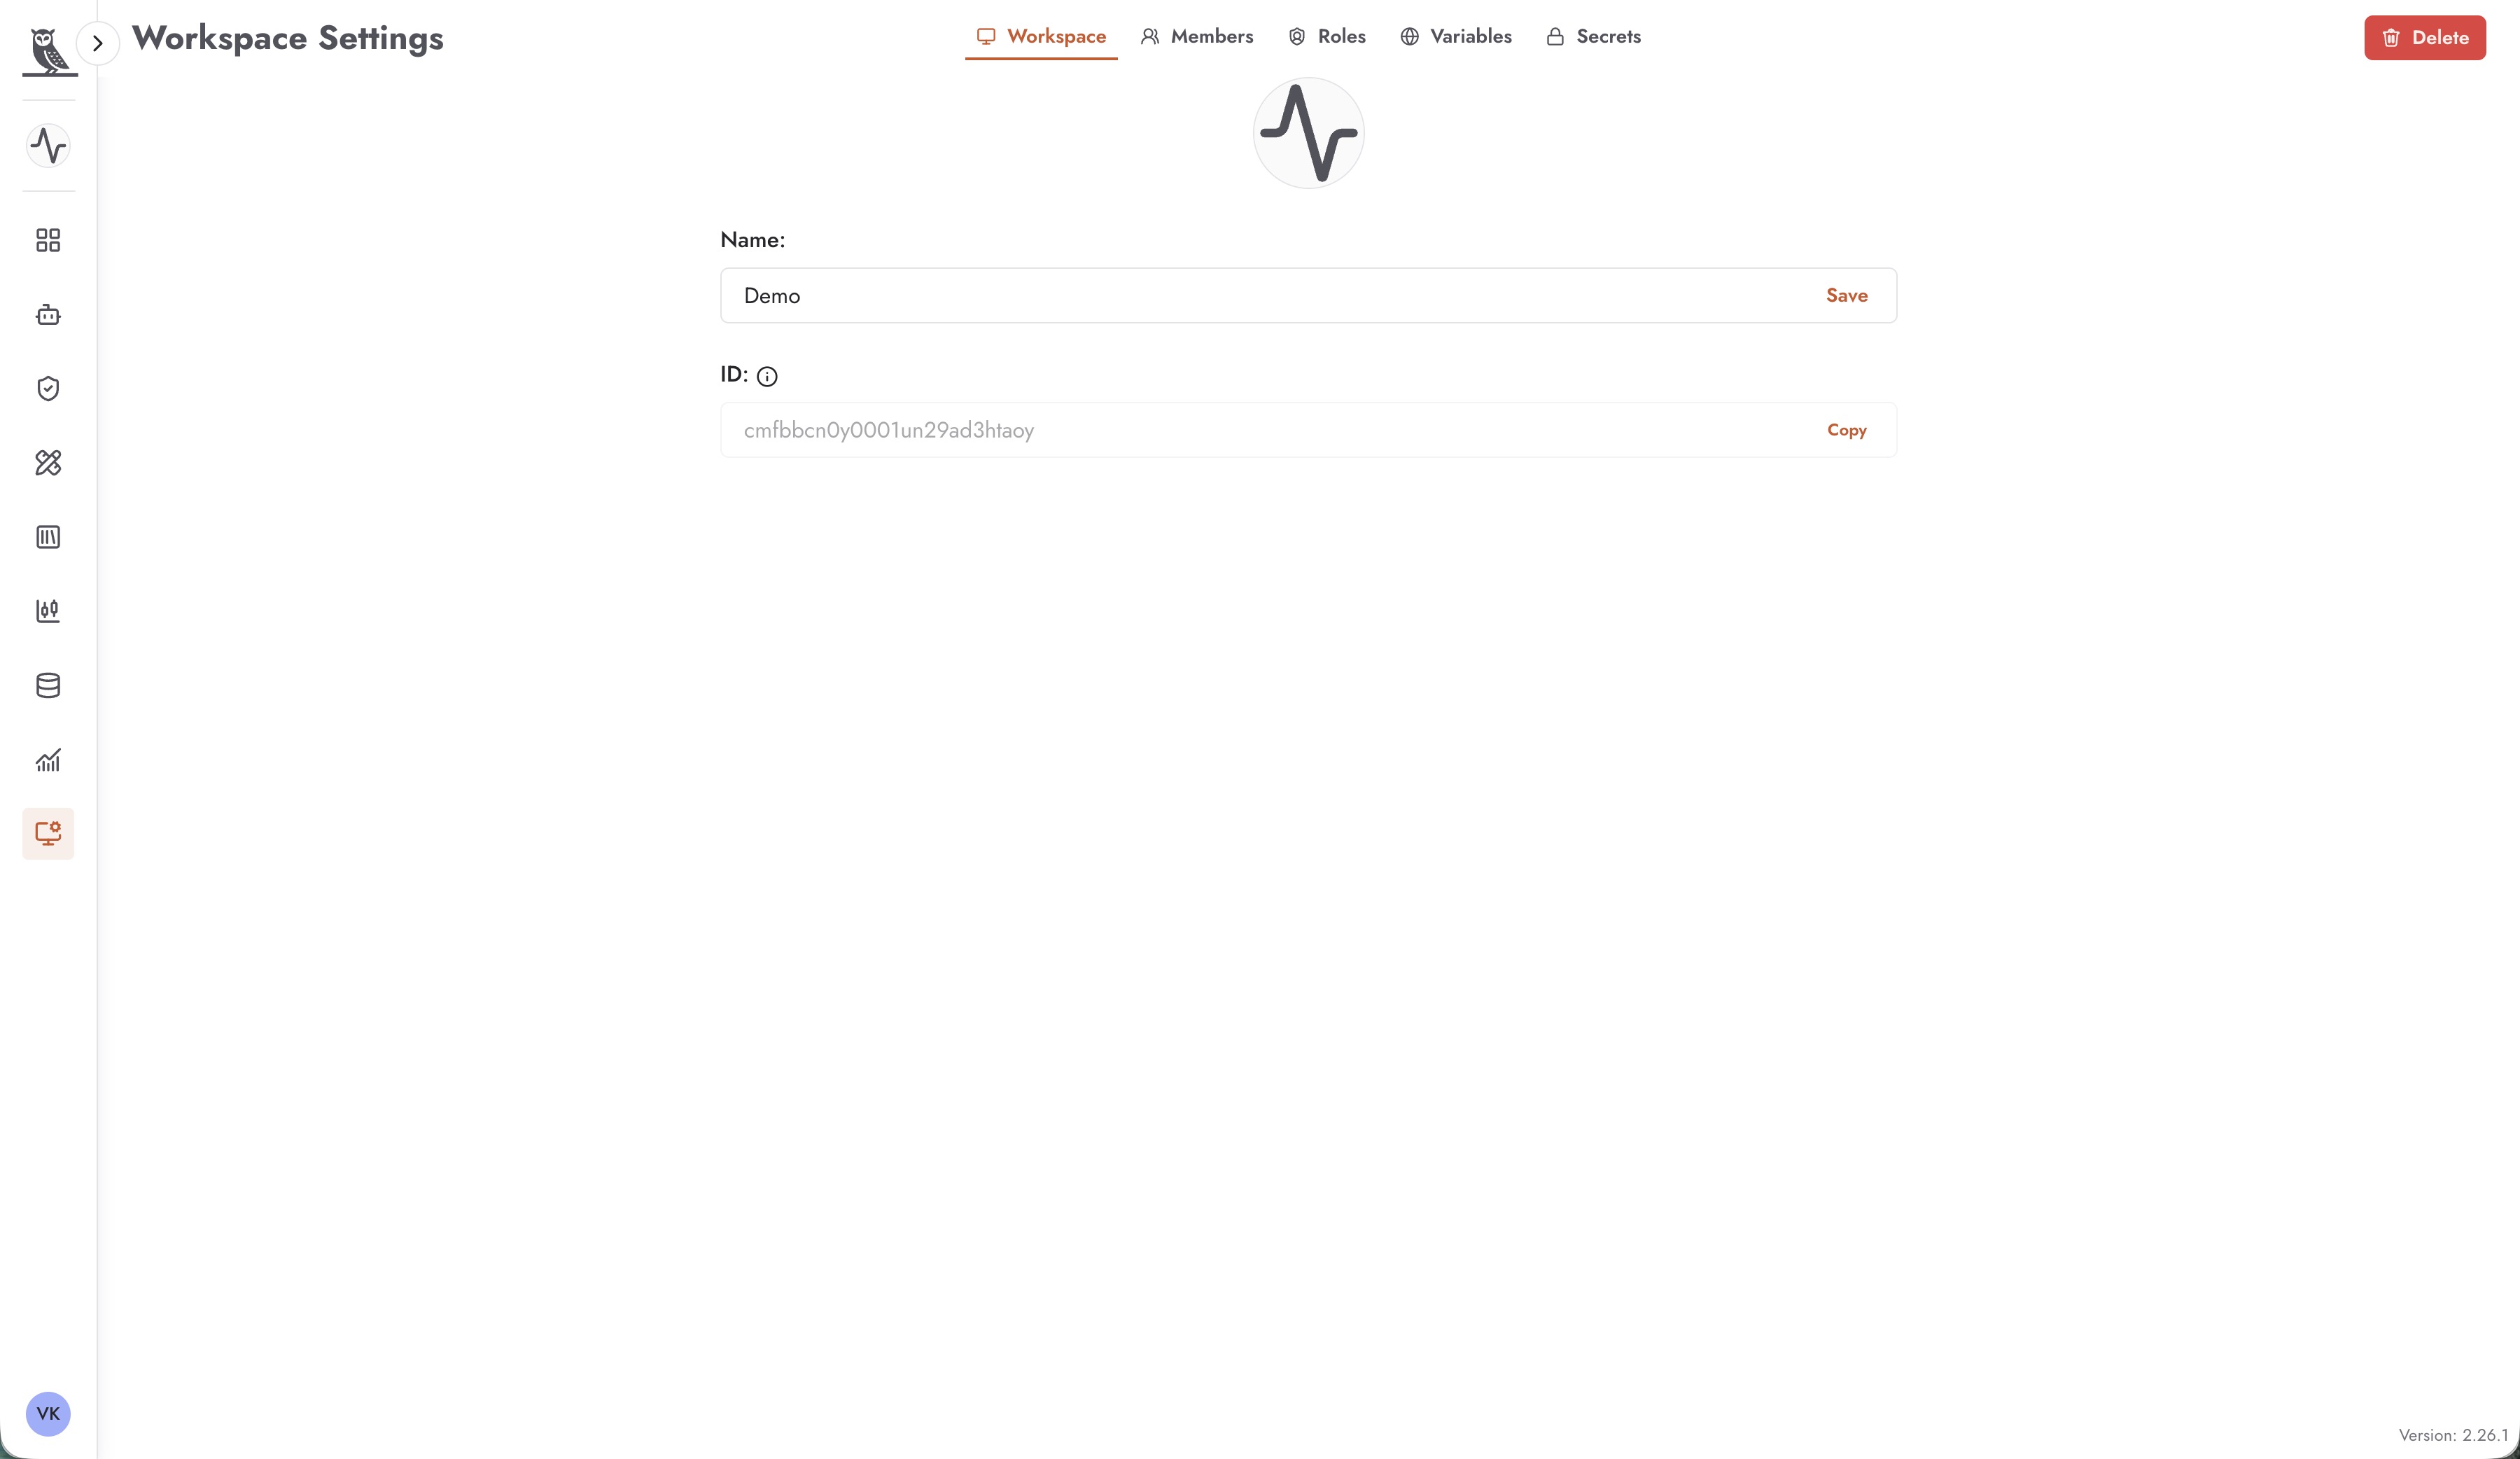
The Workspace tab provides basic configuration options for the workspace itself, including the ability to rename the workspace or delete it entirely.
Workspace Information
The Workspace tab displays:
Name - The current name of the workspace, which can be edited. Click Save after making changes to update the workspace name.
ID - The unique identifier for the workspace. This ID is system-generated and cannot be changed. Use the Copy button to copy the ID to your clipboard when needed for integrations or support requests.
Editing the Workspace Name
To rename a workspace:
Navigate to Workspace Settings and ensure you are on the Workspace tab
Edit the name in the Name field
Click Save to apply the change
Choose workspace names that are descriptive and help team members easily identify the workspace’s purpose.
Deleting the Workspace
The Delete button allows Workspace Administrators to permanently delete the workspace. This action:
Removes the workspace and all its contents
Deletes all agents, knowledge bases, and configurations within the workspace
Removes all member associations with the workspace
Cannot be undone
Exercise extreme caution when deleting a workspace. Ensure that any important configurations, agents, or data have been backed up or migrated before proceeding with deletion.
Member Management
The Members tab enables Workspace Administrators to manage who has access to the workspace and what role each member is assigned.
Viewing Members
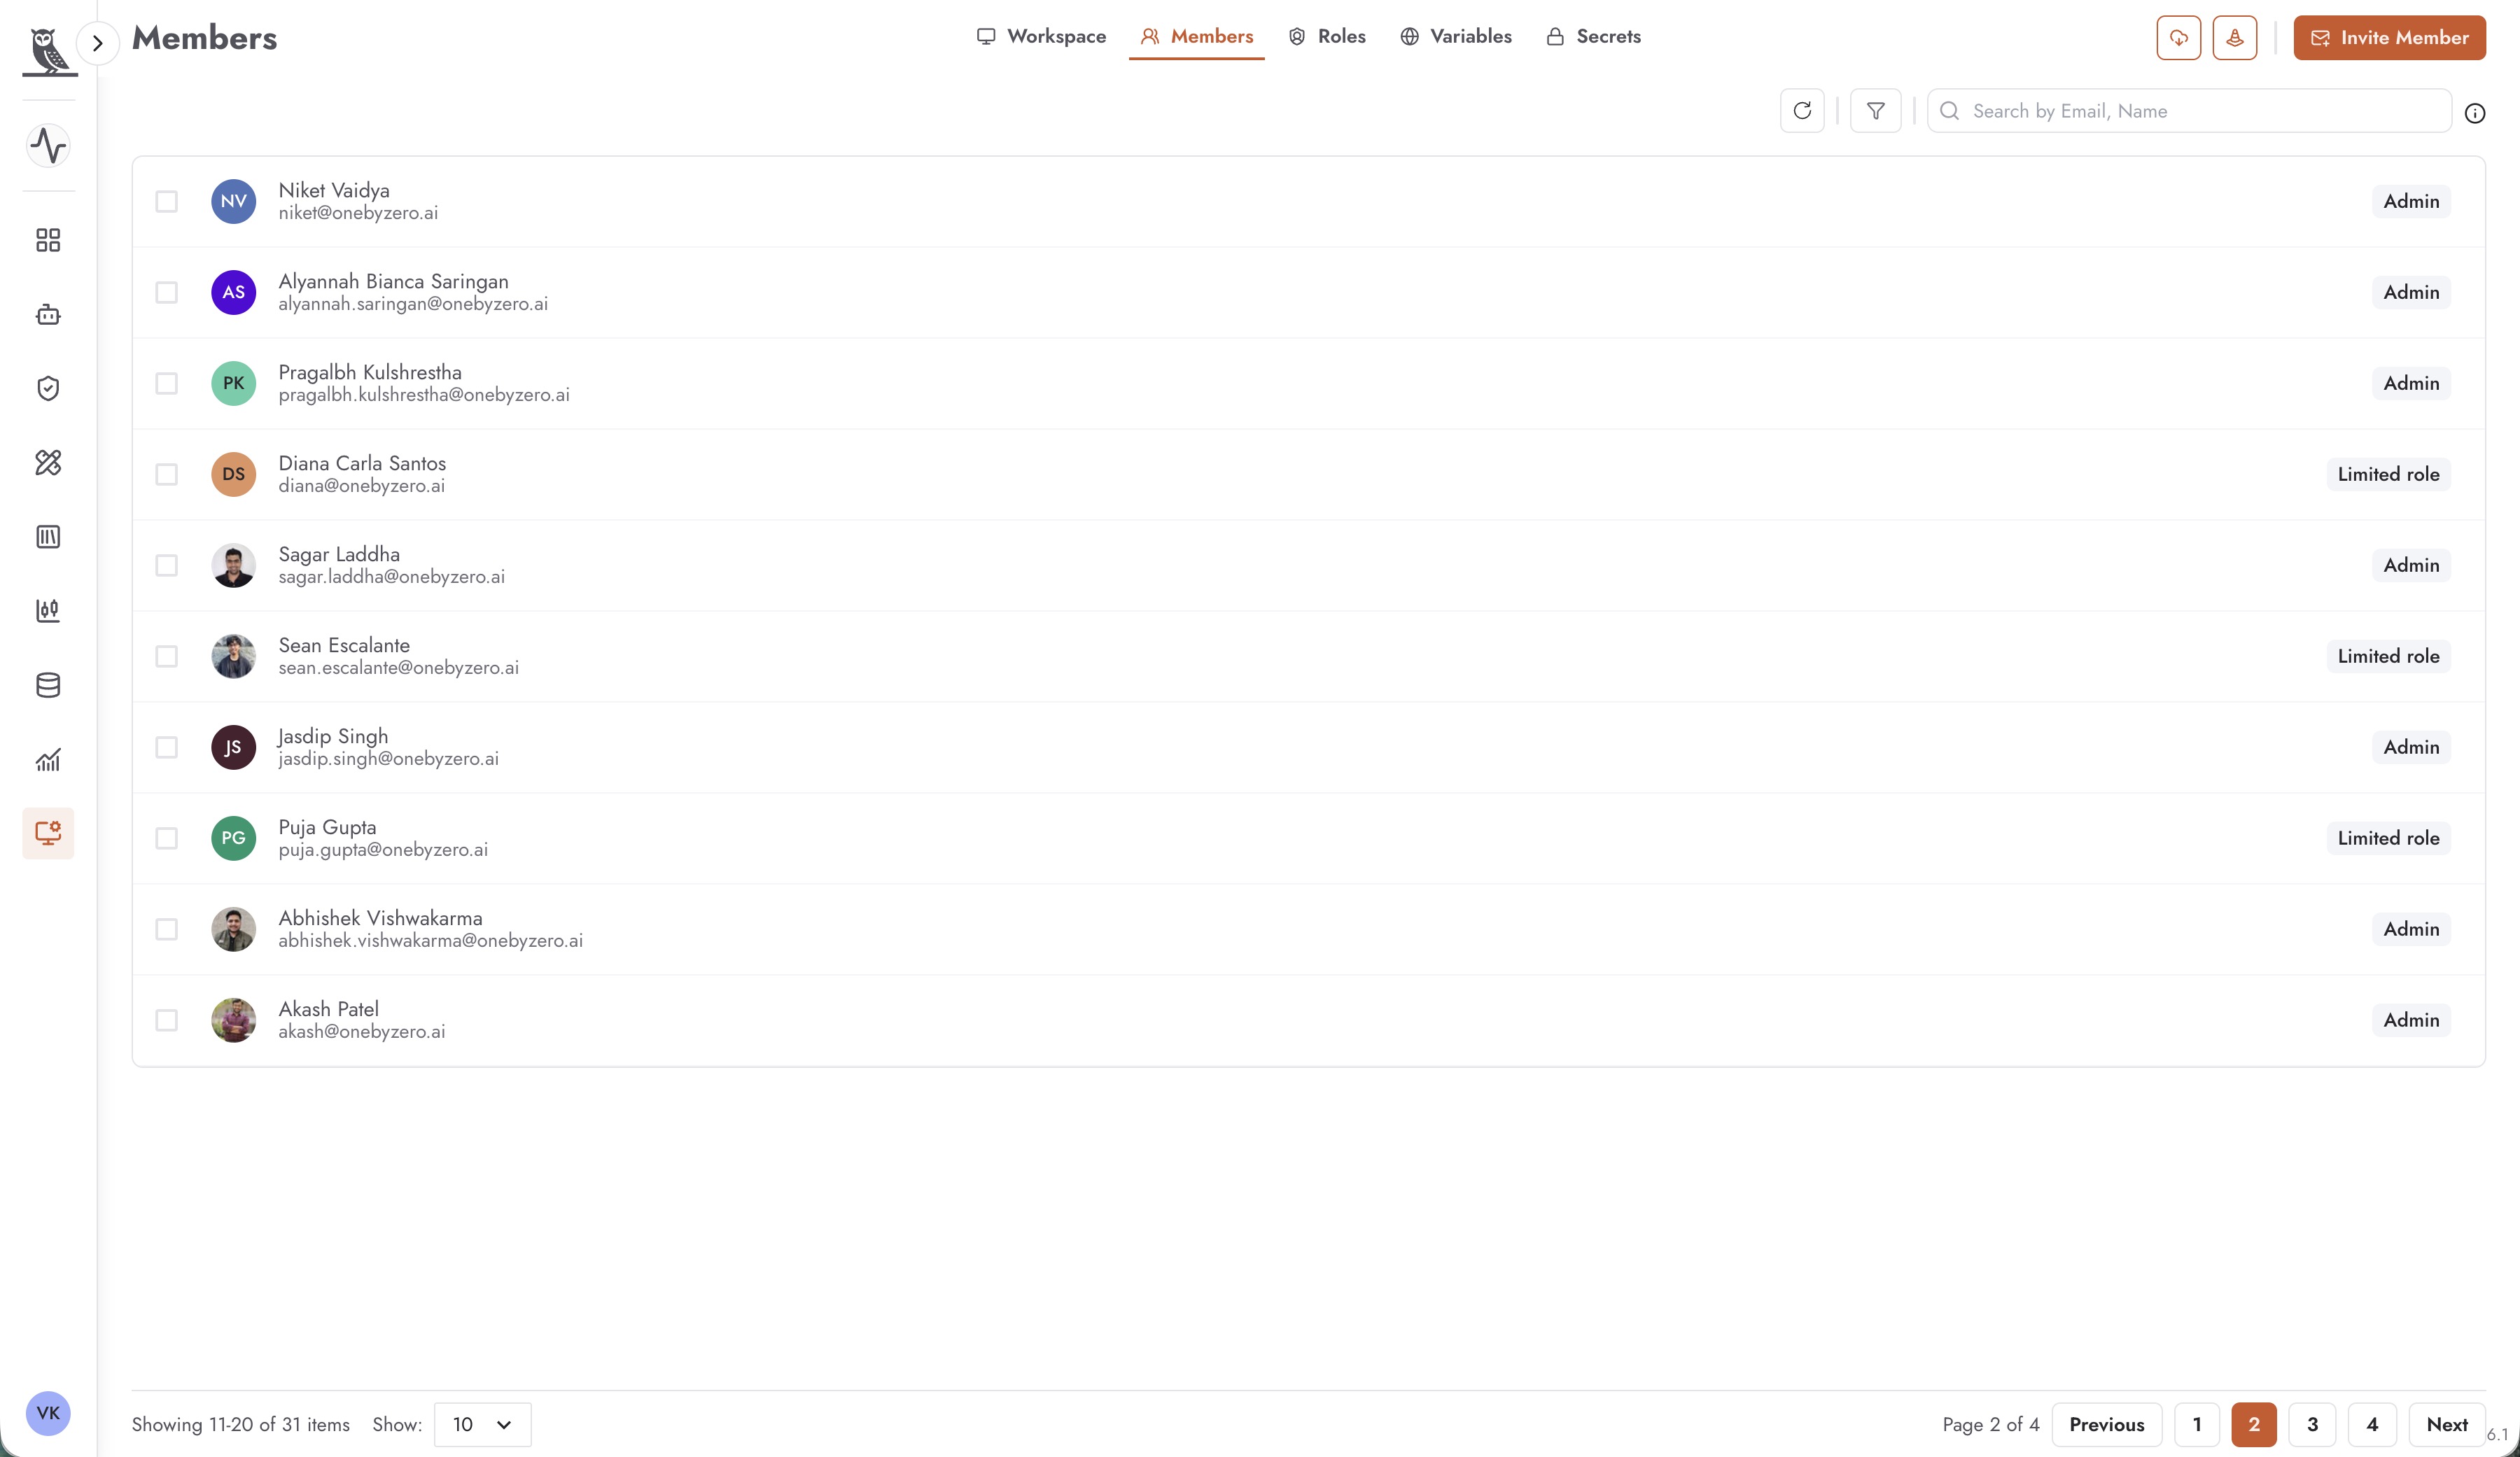
The Members tab displays all users who have access to the workspace:
Name and Avatar - The member’s display name and profile picture
Email - The member’s email address
Role - The role assigned to the member (e.g., Admin, Limited role)
Use the search box to find specific members by email or name. Pagination controls at the bottom allow you to navigate through the member list for workspaces with many members.
Inviting New Members
Click + Invite Member to add new users to the workspace. When inviting a member:
Enter the user’s email address
Select the role to assign to the new member
Send the invitation
The invited user will receive access to the workspace with the permissions defined by their assigned role.
Managing Existing Members
For each member, you can:
Change their assigned role to grant or restrict permissions
Remove them from the workspace entirely
Regularly review workspace membership to ensure that only appropriate users have access and that their roles match their current responsibilities.
Role Management
The Roles tab allows Workspace Administrators to define and manage the roles available within the workspace. Roles determine what actions members can perform and what resources they can access.
Understanding Roles
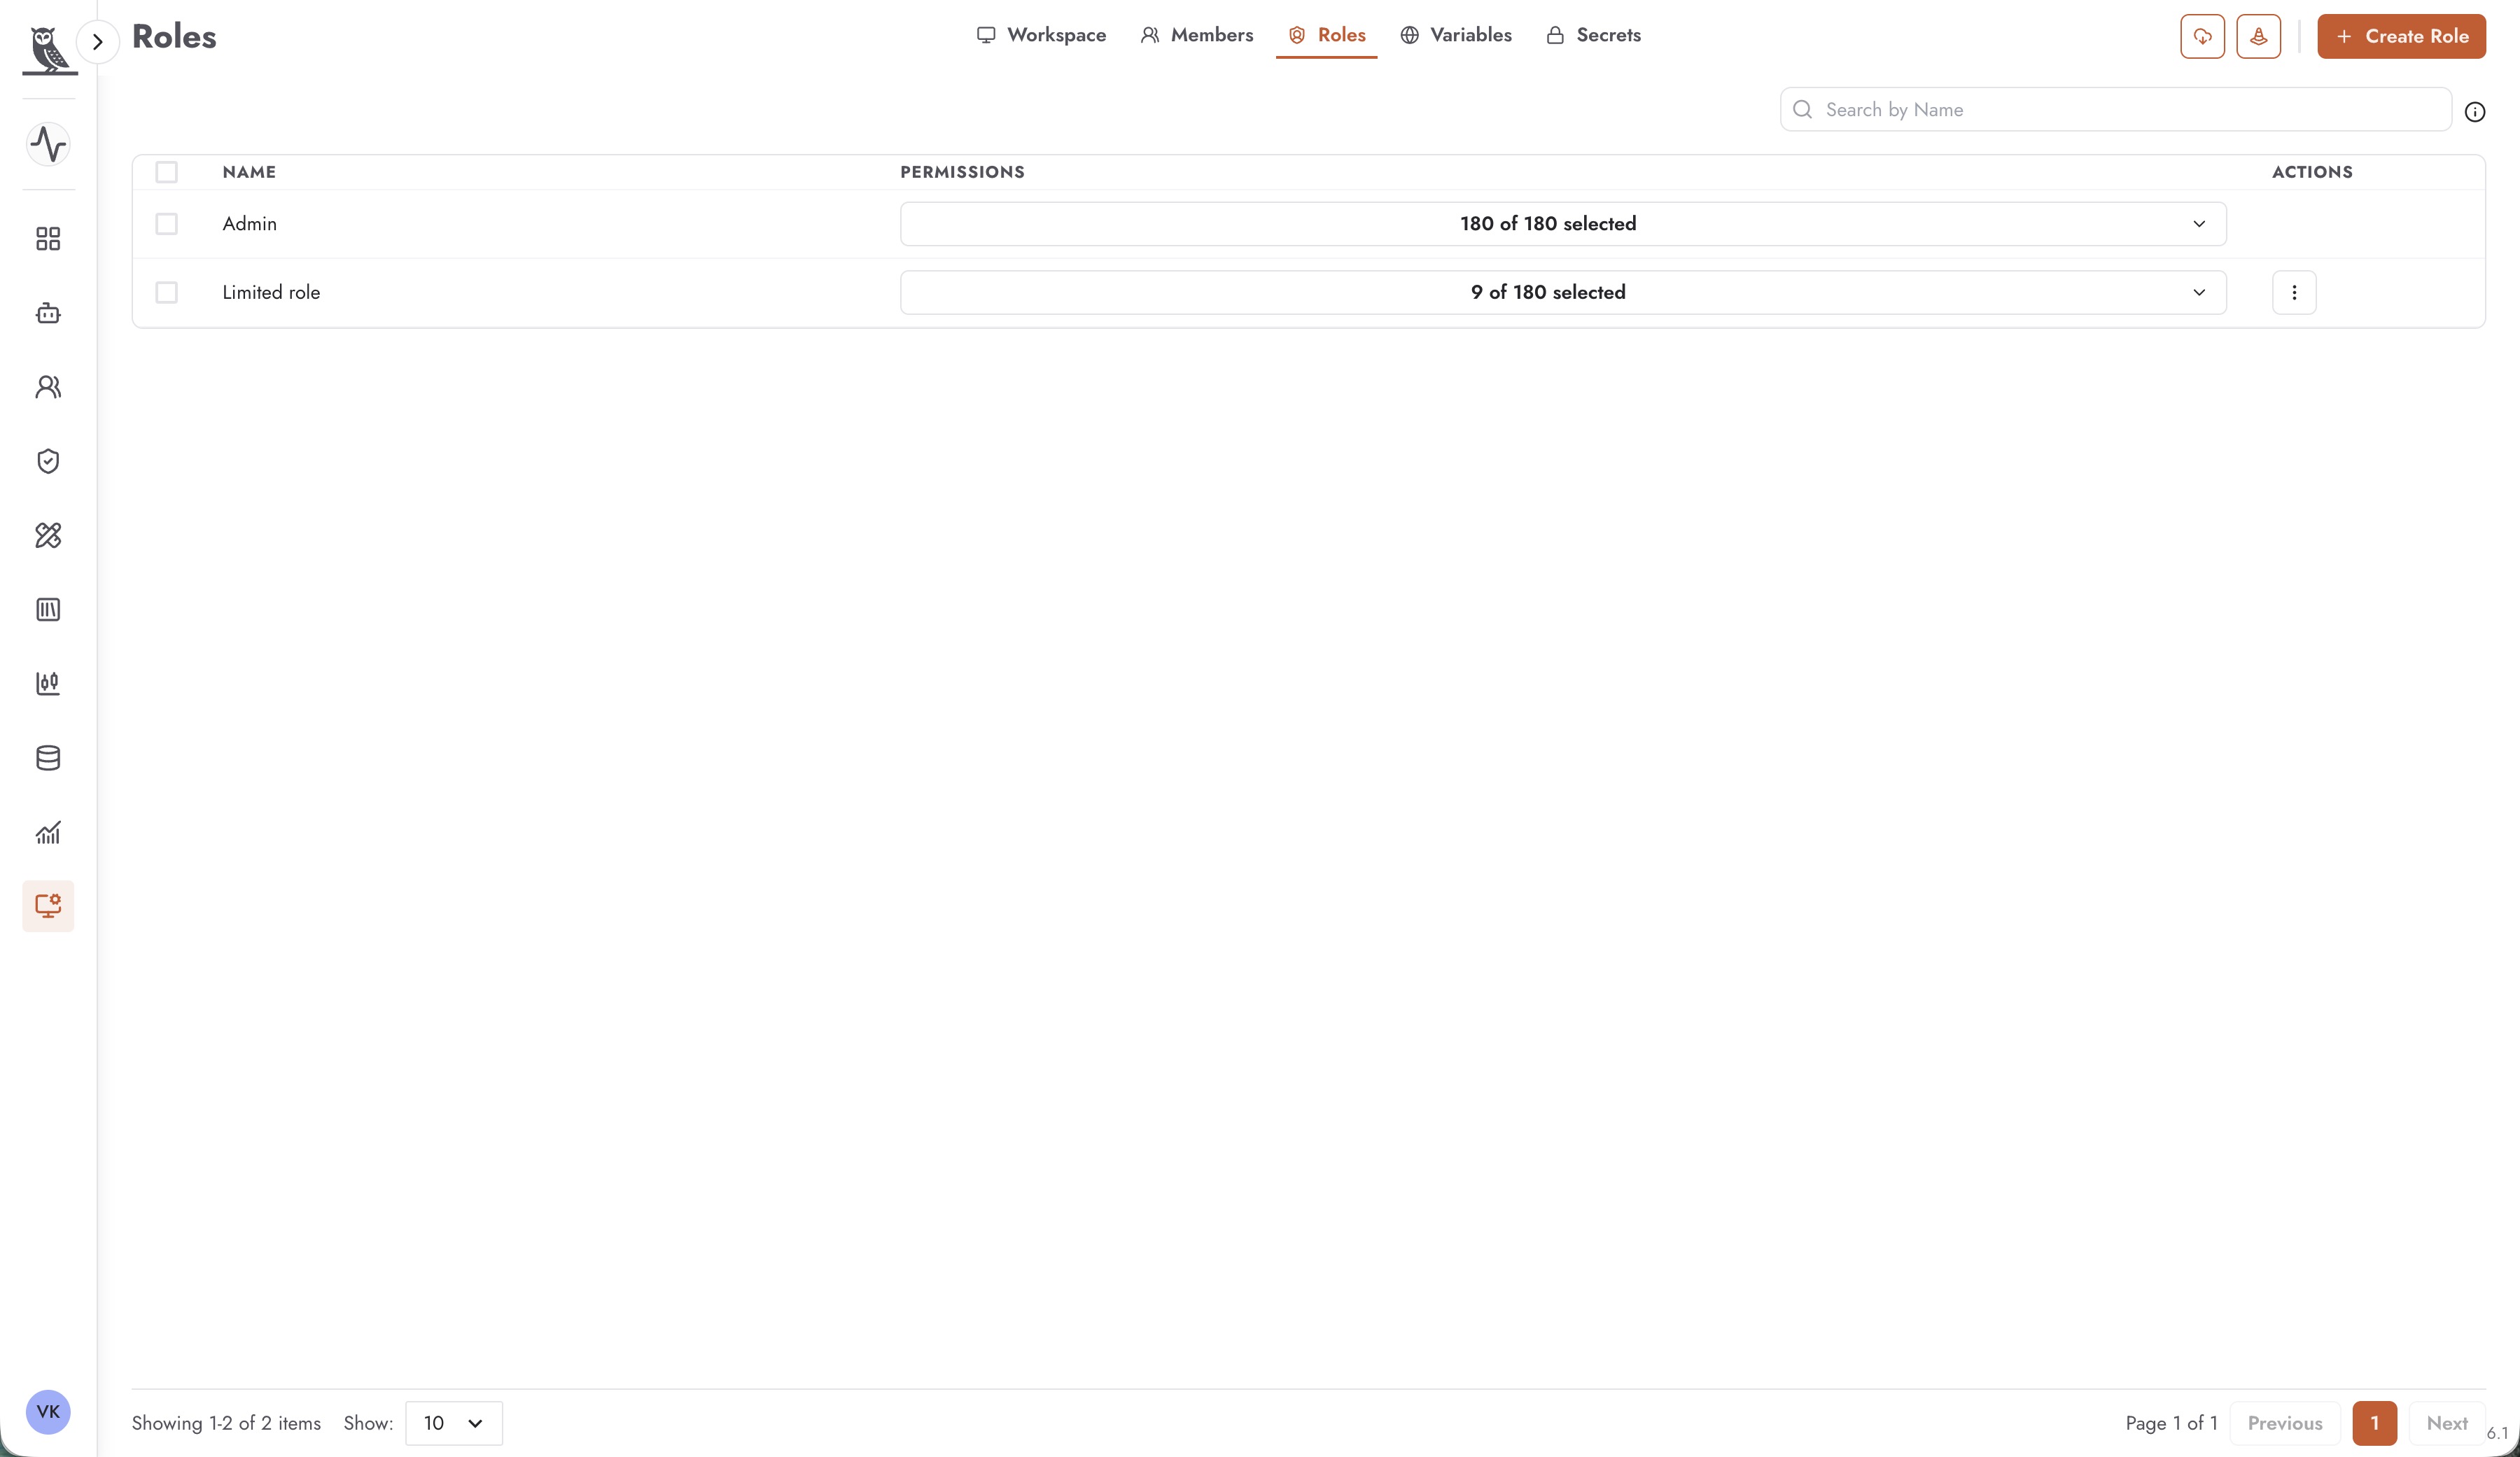
Each role is defined by a set of permissions. The Roles tab displays:
Name - The role name (e.g., Admin, Limited role)
Permissions - A summary of how many permissions are assigned (e.g., “180 of 180 selected” for full access, “9 of 180 selected” for limited access)
Actions - Menu for editing or deleting the role
Creating a New Role
Click + Create Role to define a new role with custom permissions.
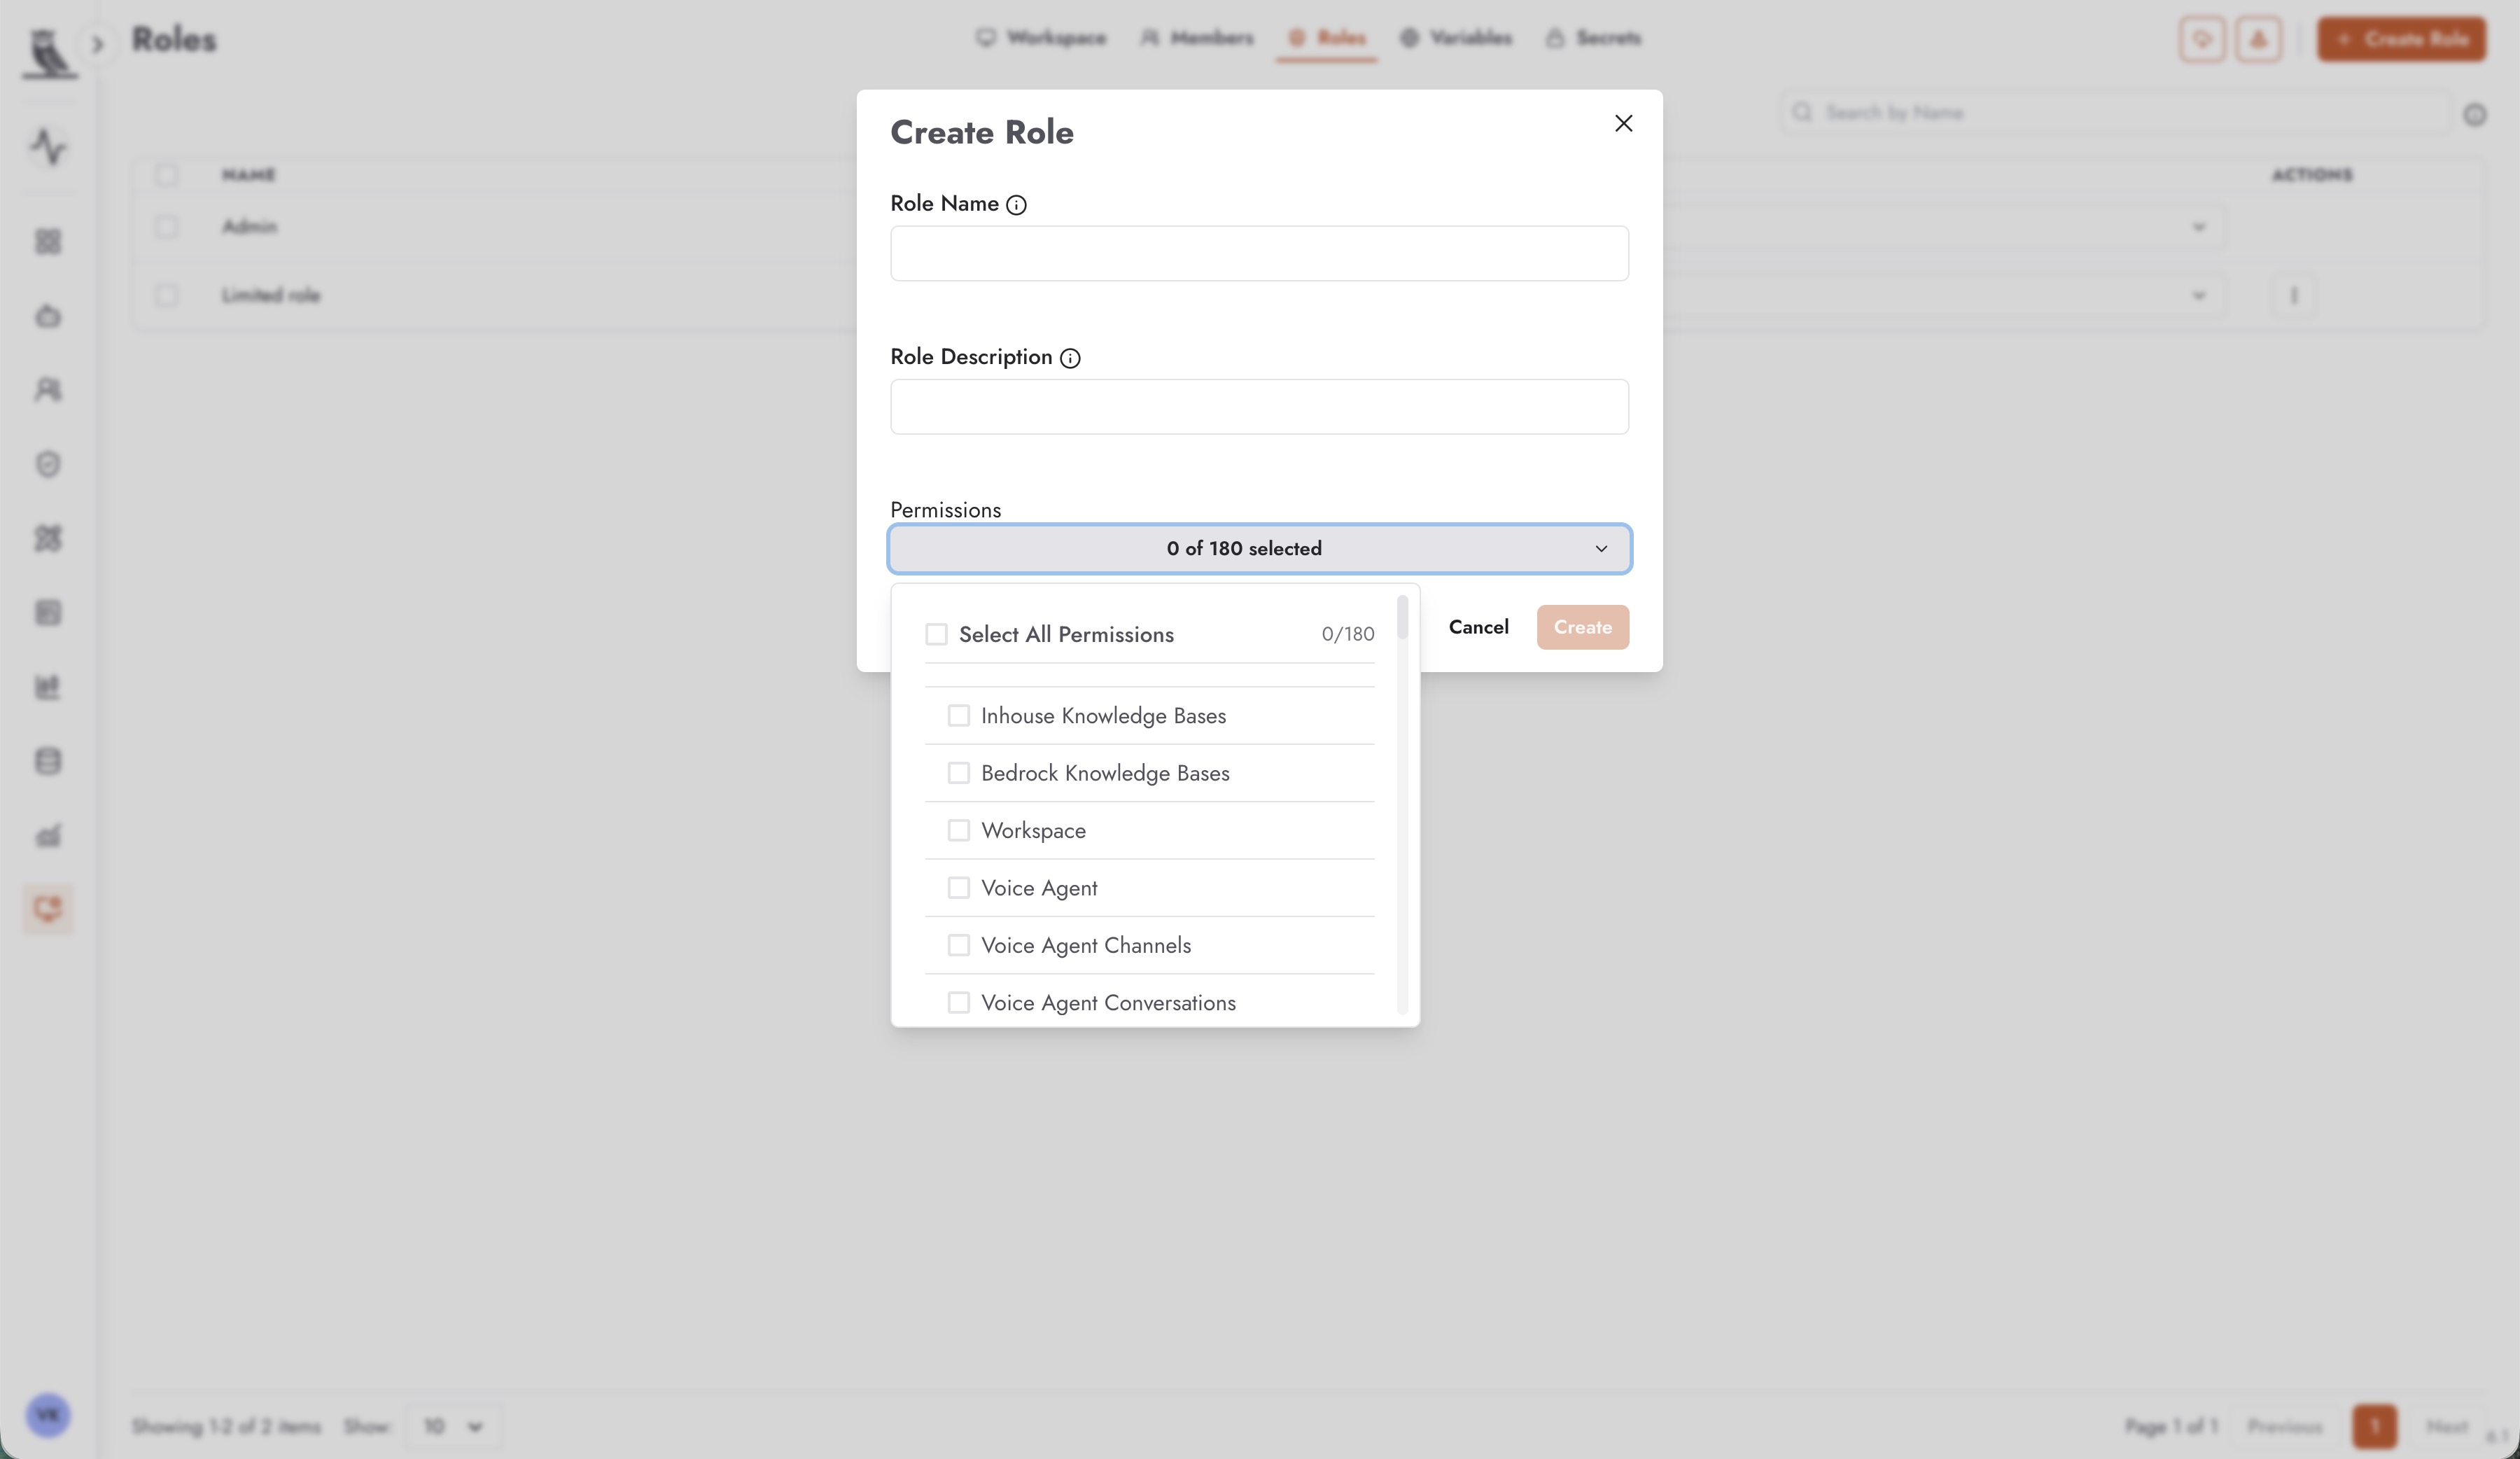
The Create Role dialog includes:
Role Name - A descriptive name for the role that indicates its purpose
Role Description - An optional description explaining what the role is intended for and who should be assigned to it
Permissions - A comprehensive list of granular permissions that can be individually selected or deselected
Available Permissions
Neo provides fine-grained permissions across various resource types. You can select permissions for:
Inhouse Knowledge Bases - Access to in-house knowledge base resources
Bedrock Knowledge Bases - Access to Bedrock knowledge base resources
Workspace - Workspace-level settings and configuration
Voice Agent - Creating and managing voice agents
Voice Agent Channels - Managing voice agent telephony channels
Voice Agent Conversations - Viewing voice agent conversation logs
And many more categories covering all aspects of Neo functionality
Use Select All Permissions to grant full access, or individually select specific permissions to create a restricted role tailored to specific responsibilities.
Editing Roles
Use the Actions menu to modify existing roles. You can:
Update the role name and description
Add or remove permissions
Delete roles that are no longer needed
When editing a role, changes apply immediately to all members assigned to that role.
Deleting Roles
Roles can be deleted through the Actions menu. Before deleting a role:
Ensure no members are currently assigned to the role, or reassign them to a different role
Consider whether the role might be needed in the future
Variables Management
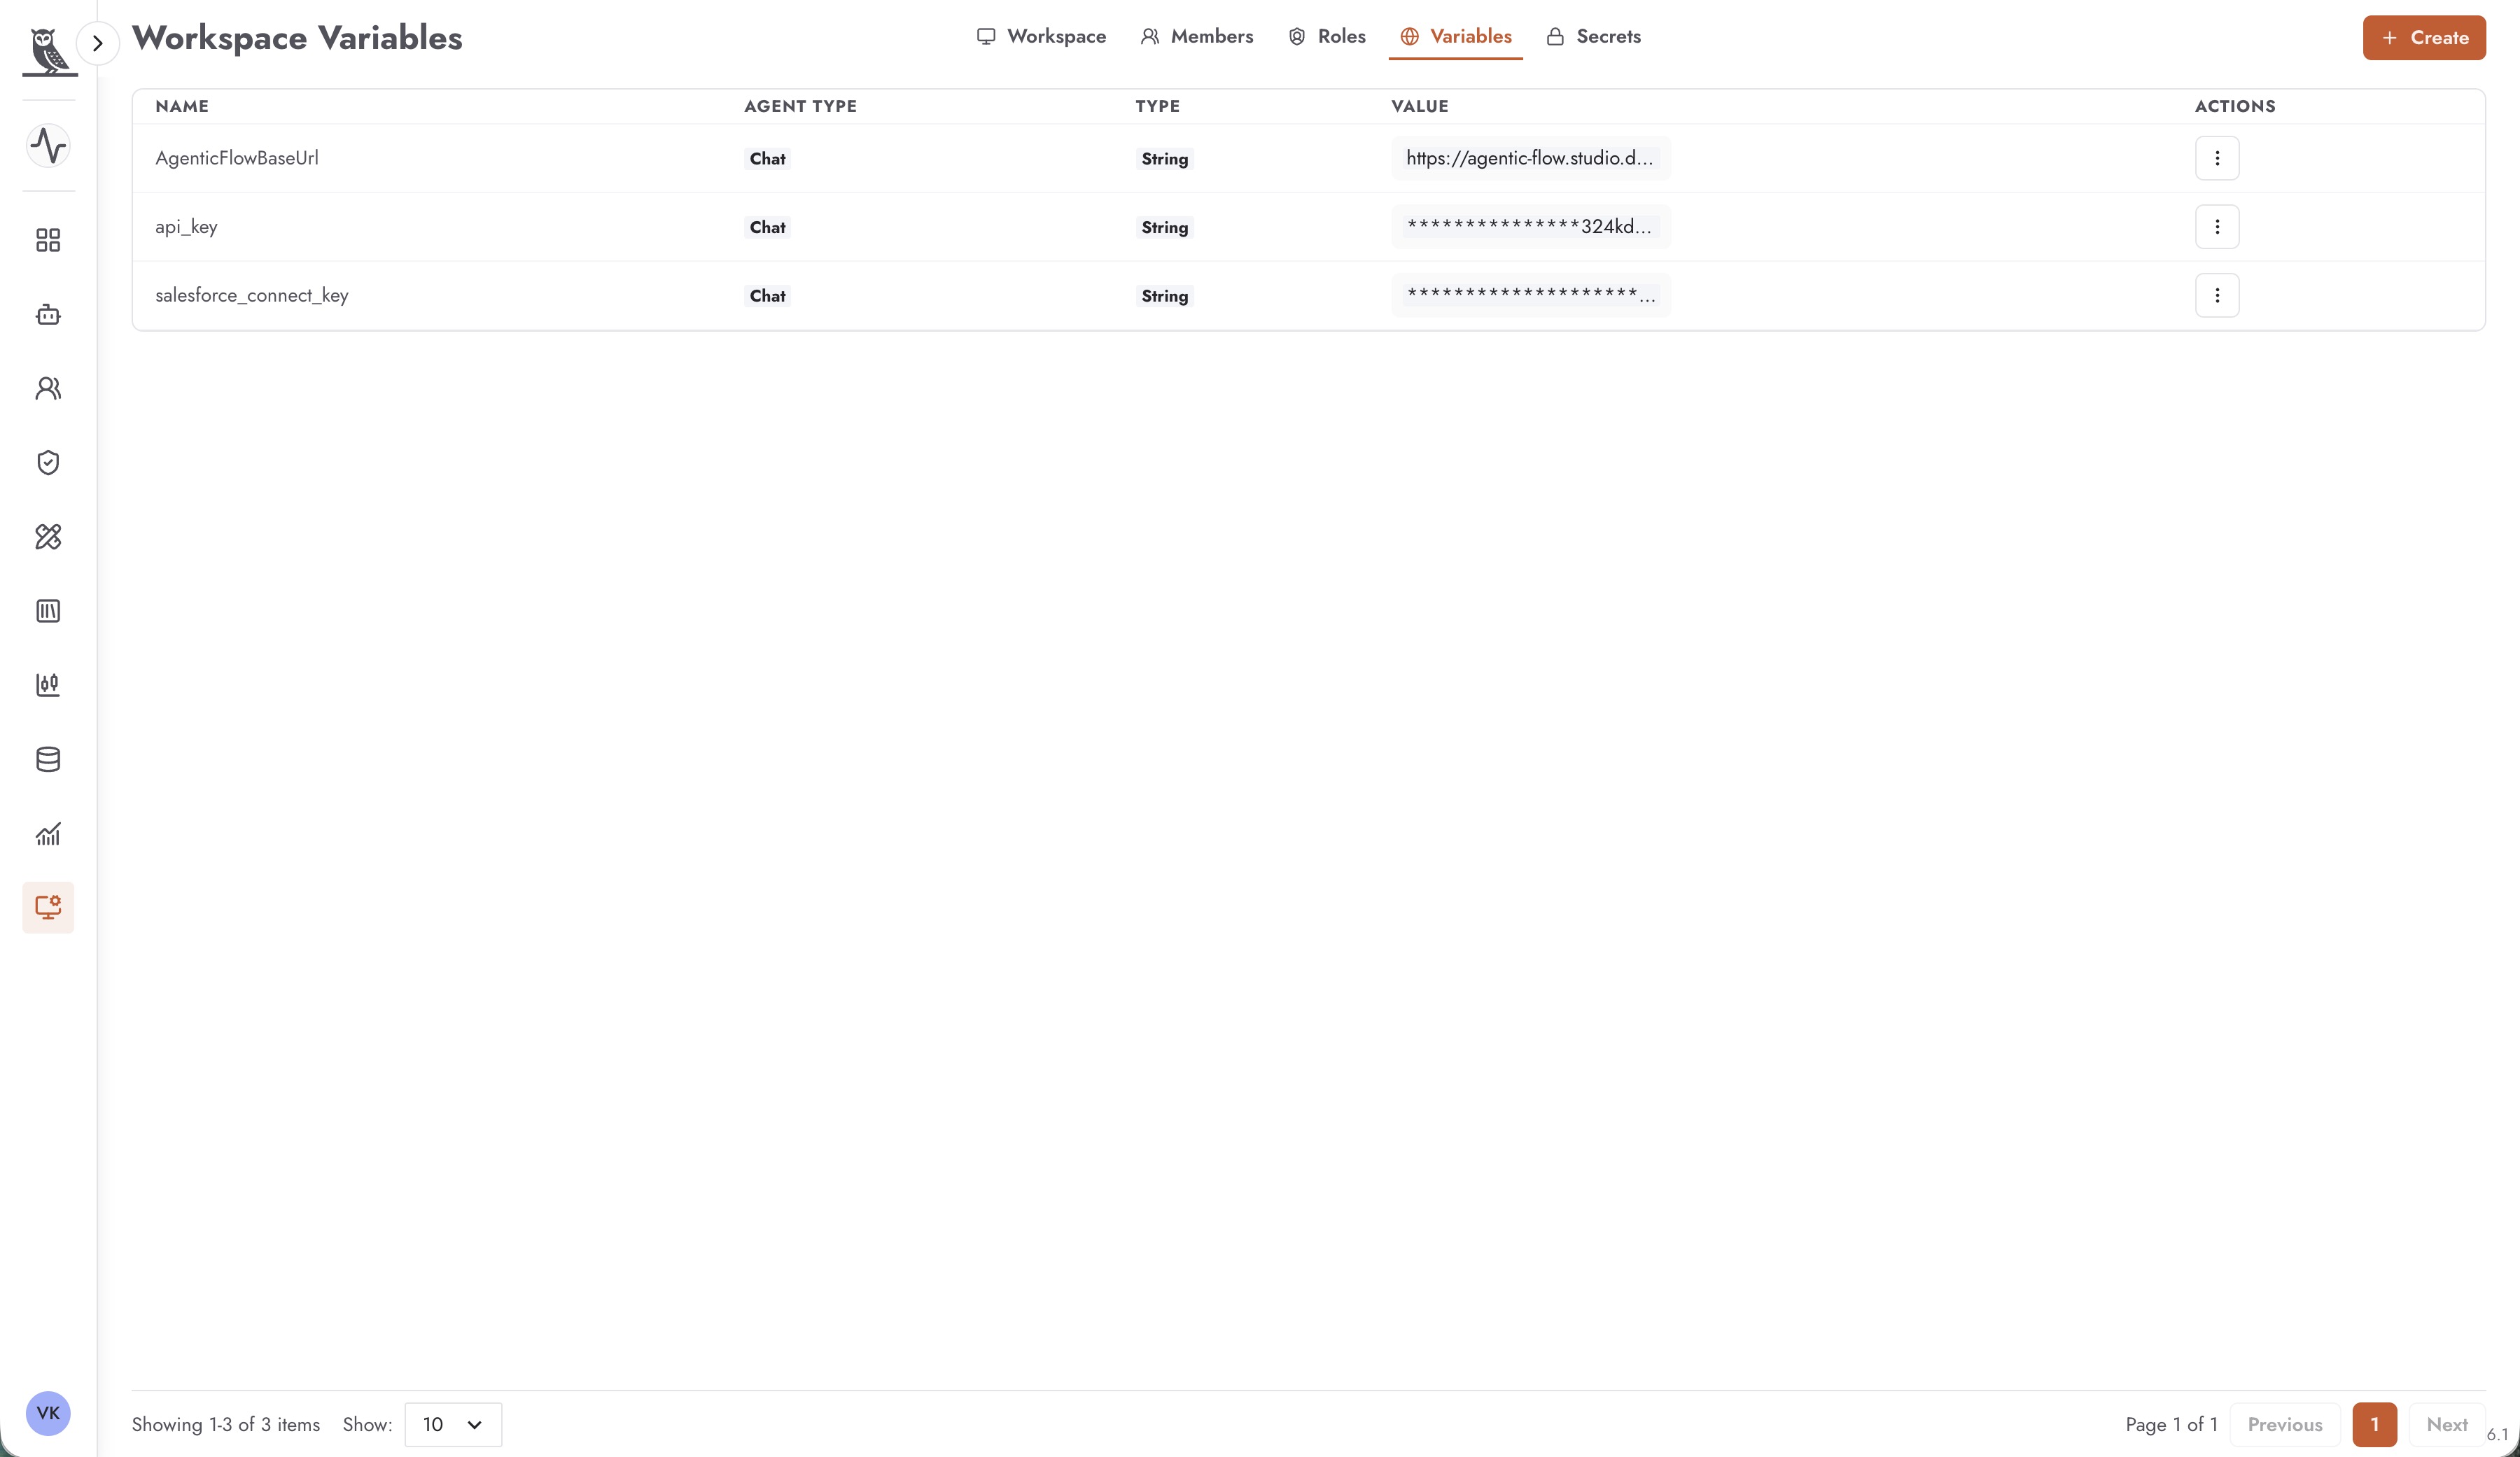
The Variables tab enables Workspace Administrators to manage configuration variables that can be used by agents within the workspace. Variables provide a way to store and manage configuration values separately from agent logic.
Understanding Variables
Variables are key-value pairs that agents can reference during execution. The Variables tab displays:
Name - The variable name (e.g., AgenticFlowBaseUrl, api_key, salesforce_connect_key)
Agent Type - Which agent types can access this variable (e.g., Chat)
Type - The data type of the variable (e.g., String)
Value - The variable’s value (sensitive values are masked with asterisks)
Actions - Menu for editing or deleting the variable
Creating Variables
Click + Create to add a new variable. When creating a variable:
Provide a descriptive name that indicates the variable’s purpose
Select the agent type that should have access to the variable
Specify the data type
Enter the value
Use Cases for Variables
Variables are useful for:
API Endpoints - Store base URLs for external services (e.g., AgenticFlowBaseUrl)
API Keys - Store authentication keys for third-party services
Configuration Values - Store settings that may change between environments
Integration Parameters - Store connection details for enterprise systems
By using variables instead of hardcoding values into agents, you can:
Change configuration without modifying agent logic
Use different values in different environments (development, staging, production)
Centrally manage sensitive configuration data
Managing Variables
Use the Actions menu to:
Edit existing variables to update their values
Delete variables that are no longer needed
Secrets Management
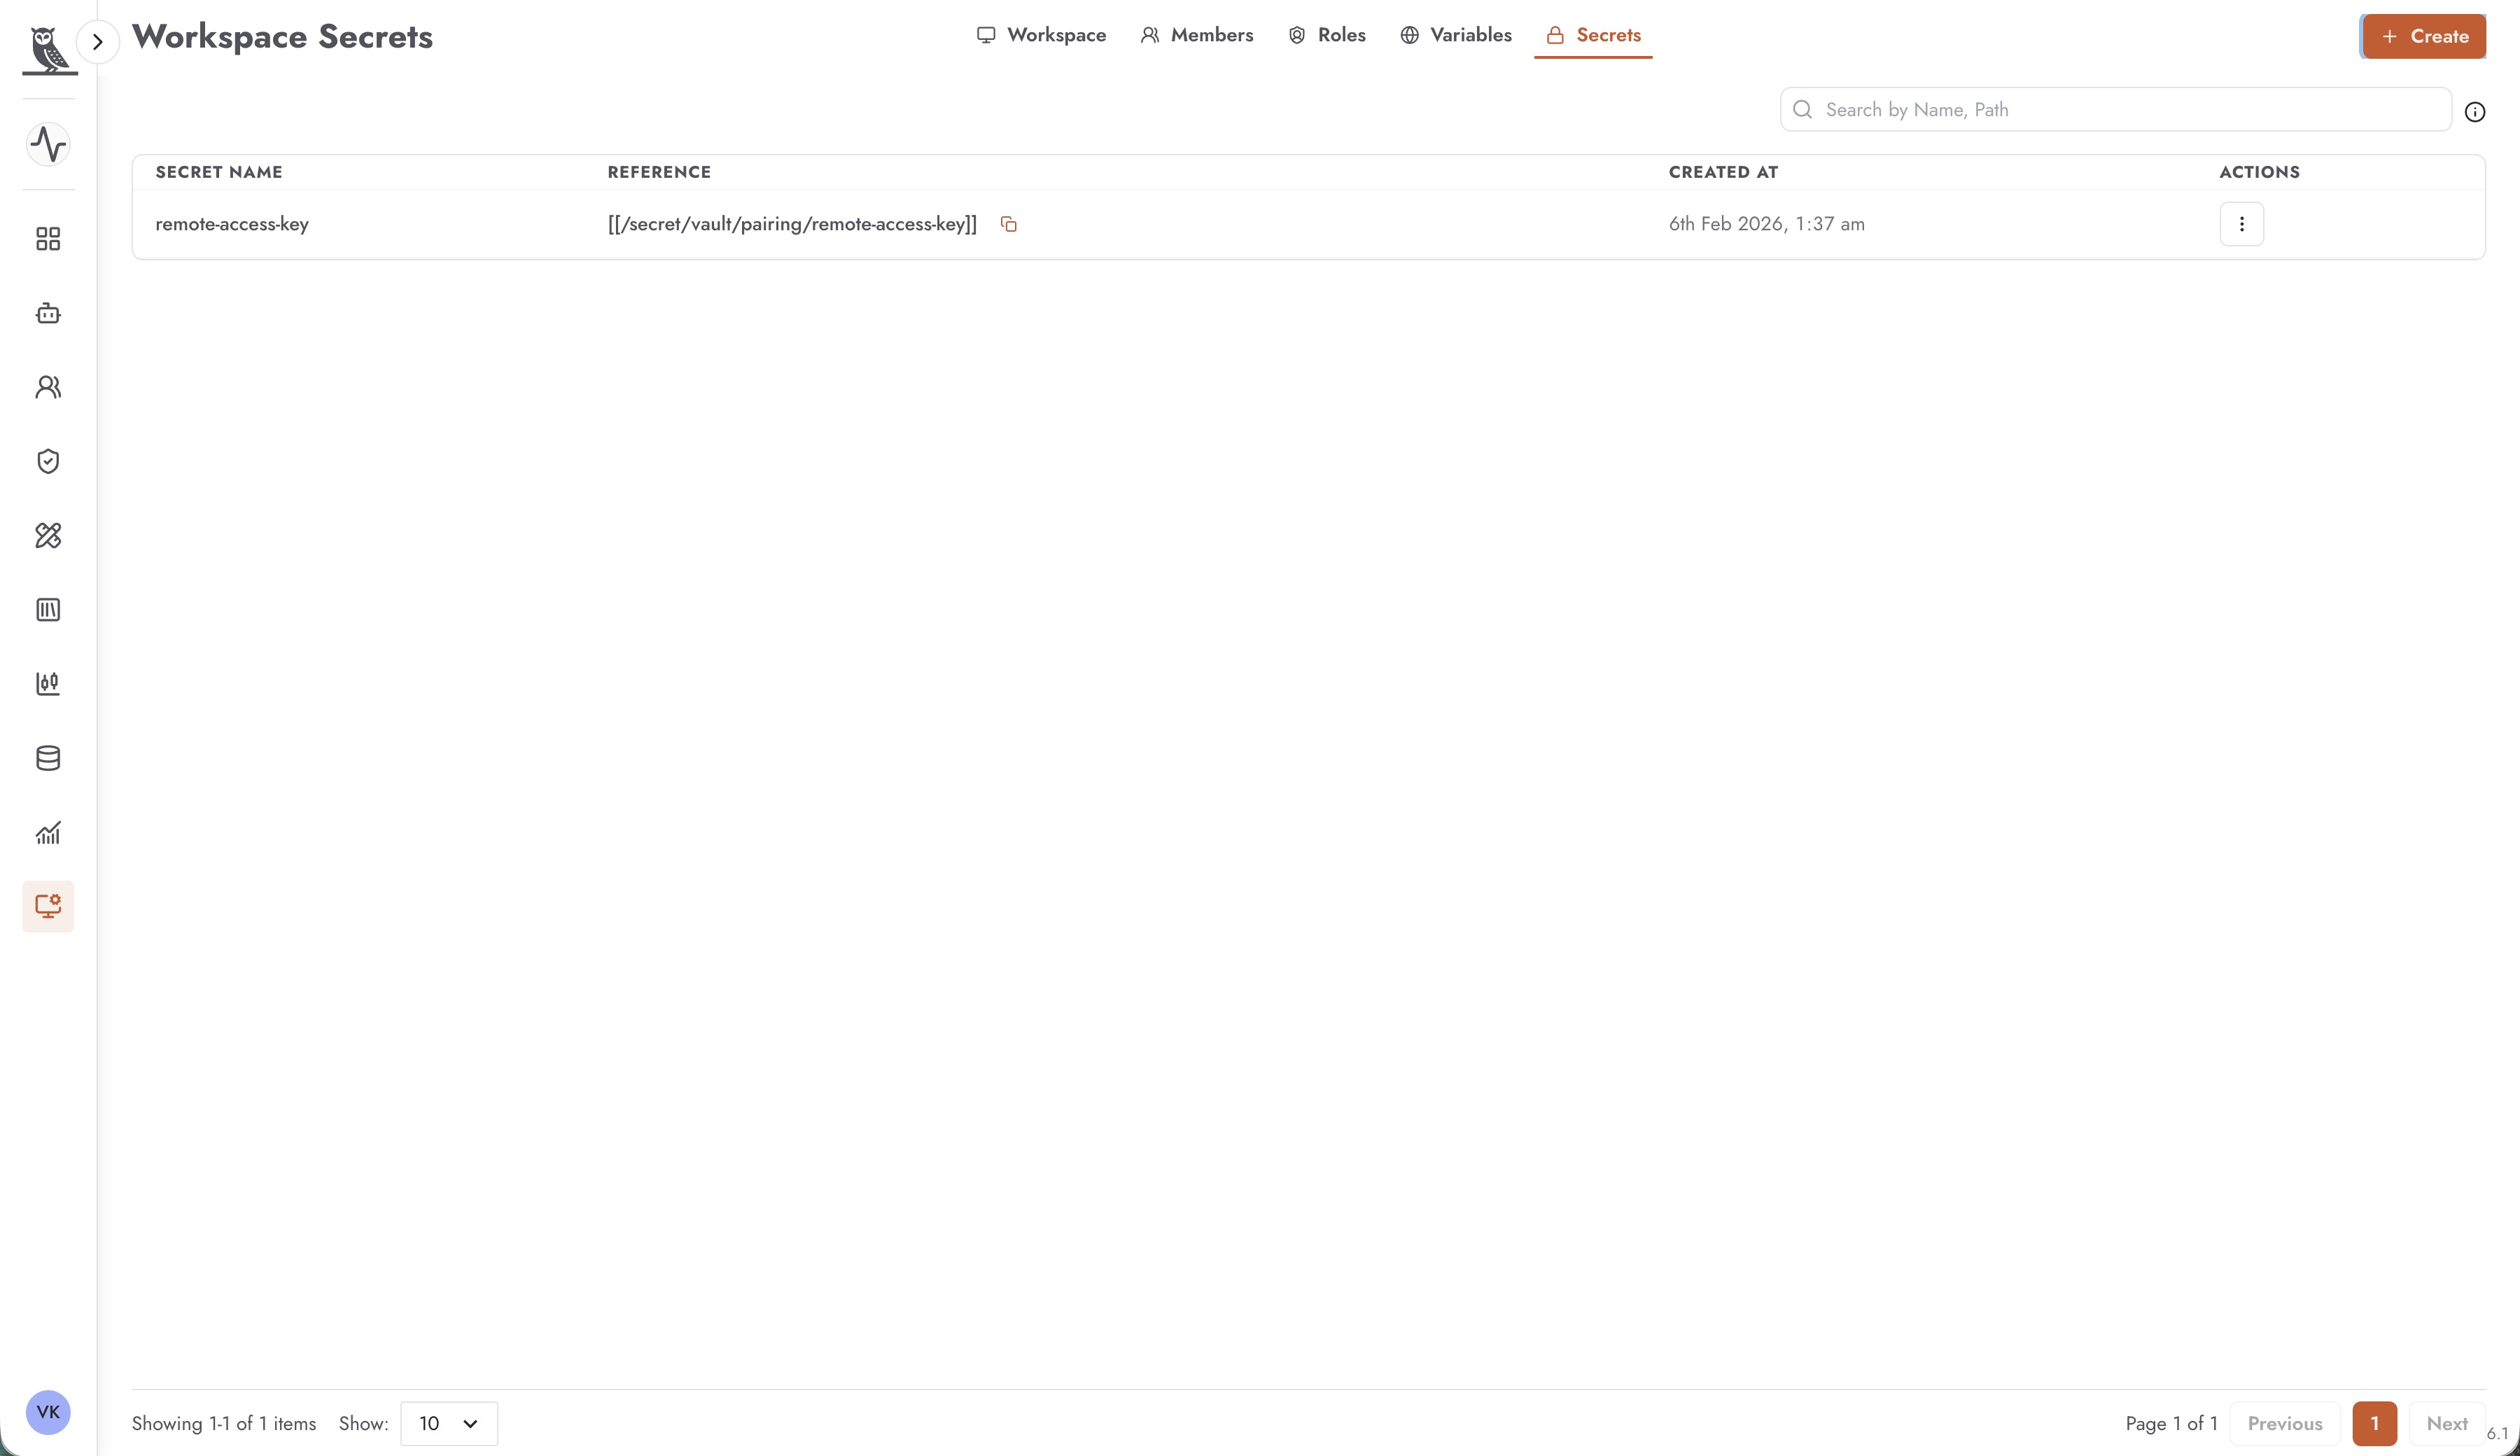
The Secrets tab provides secure storage for sensitive credentials and keys that agents need to access external systems. Unlike variables, secrets are stored with additional security measures and are designed specifically for sensitive data.
Understanding Secrets
Secrets are securely stored sensitive values that can be referenced by agents. The Secrets tab displays:
Secret Name - A descriptive name for the secret (e.g., remote-access-key)
Reference - The vault path used to access the secret (e.g., [[/secret/vault/pairing/remote-access-key]])
Created At - When the secret was created
Actions - Menu for managing the secret
Creating Secrets
Click + Create to add a new secret. When creating a secret:
Provide a descriptive name that indicates what the secret is for
Enter the secret value securely
The system will generate a reference path that agents use to access the secret
Security Considerations
Secrets in Neo are:
Stored securely using vault-based storage
Never displayed in plain text in the UI after creation
Accessed by agents through secure reference paths
Auditable for compliance purposes
Use Cases for Secrets
Secrets are appropriate for:
API Keys and Tokens - Authentication credentials for external APIs
Database Credentials - Usernames and passwords for database connections
Service Account Keys - Credentials for cloud service accounts
Encryption Keys - Keys used for data encryption or signing
Third-Party Integration Credentials - Passwords and tokens for enterprise systems
Managing Secrets
Use the Actions menu to:
Update secret values when credentials are rotated
Delete secrets that are no longer needed
Best Practices for Workspace Administration
- Member Management
Regularly audit workspace membership. Remove users who no longer need access and ensure roles are appropriate for each member’s responsibilities.
- Role Design
Create roles that follow the principle of least privilege. Users should have only the permissions they need to perform their job functions.
- Variable Organization
Use consistent naming conventions for variables. Group related variables logically and document their purpose.
- Secret Rotation
Implement regular secret rotation for sensitive credentials. Update secrets when team members leave or when there’s any suspicion of compromise.
- Workspace Hygiene
Keep workspace names descriptive and up-to-date. Archive or delete workspaces that are no longer actively used.